
Here are Carl's most recent personal blog entries. More information about the blog is available.
Welcome to the 2015 edition of Carl's Christmas Puzzle Hunt. If you're wondering what all of this is about, you can read the history of my Christmas puzzles.
Since I designed these puzzles for my sons, some of the artwork and imagery will have more meaning to them than it would to anyone else. But the puzzles themselves are all designed so that they can be solved using only general knowledge and logic.
The puzzles this year include word games (anagrams, cryptograms), logic puzzles (sudoku, star battle, fillomino, yajilin), and other classic puzzles (riddles, mazes, etc.) as well as a few unique surprises. Of course, there's also a big meta-puzzle to pull it all together.
I'm very interested in any feedback you might have, positive or negative, about puzzles, themes, difficulty, etc. So please share whatever comments you have. I'm also happy to confirm solutions to any puzzles in the hunt or to provide additional hints if needed. So feel free to email me at: Carl Worth <cworth@cworth.org>.
Solvers
The following individuals and teams have provided me with a correct solution to the entire puzzle hunt:
Cameron, Hyrum, Andrew, and Scott Worth: December 2015
Jigsaw (Andrew Bradburn): March 2016
DelphiRune (Steve Watt and Anita Hollister): July 2016
Conundrum (Robert Haight): July 2016
Errata
The following mistakes managed to creep into the puzzles and have not yet been corrected.
Remarkable Change: One change spans two rows. Take the letter from the lower of the two rows.
Be Prepared, My Boy!: The words TALKS and ARENA appear incidentally in the grid and should be ignored.
Olympian Teaser: This puzzle probably deserves some additional definitions for the six items/figures you need to determine. So use these hints if you are stumped (highlight the hidden text to reveal it):
His ship shares a name with a 2012 Ben Affleck flick
The preferred instrument of Gheorghe Zamfir
More properly a "jar", it contained all the evils of the world
An image of this goddess was used in Honda motorcycle logos in 1948 (today, only her wings remain)
Their love began as a bribe from Aphrodite to win a beauty contest
A son of King Telamon, his name today might appear more often under the bathroom sink or in web programming
The puzzle hunt is available in two forms:
Complete puzzle hunt (30-page PDF)
Download the Complete Puzzle Hunt.
Individual Pages
I designed these puzzles for my four sons at Christmastime. When we placed their gifts under the tree, we didn’t put any names on them, but instead each gift had one of the 16 rather puzzling tags you can find below. A correct solution for all of the puzzles will allow the solver to determine which of my sons should receive each gift. (My sons are named Cameron, Hyrum, Andrew, and Scott)
(Click on thumbnails for single-page PDF of each puzzle)
Gift Tags


The Ornament Puzzles


The Final Puzzle

Hints and Credits
CAUTION: There are some (mild) spoilers in this section. Consider yourself warned.

I just had my fifth puzzle published at GM Puzzles.
This was a fun one. It's my second Star Battle puzzle, and it's definitely more approachable than my previous dual-grid Star Duel. (Incidentally, that giant Star Duel was noted as one among several of the best object-placement puzzles of 2014 at GM Puzzles. I'm happy to see that people liked it.)
I got the idea for today's Star Battle when reading that best-of post. One of the other puzzles noted there was this lovely 9-pentomino Star Battle by Zoltán Horváth. The post mentioned that another designer, Jiří Hrdina, had independently designed a similar 9-pentomino Star Battle. (I can't link directly to that one since it's not freely available on the web. It's contained in The Art of Puzzles: Star Battle e-book available for sale). Then, in the comments, Matúš Demiger mentioned that he had also independently constructed a third 9-pentomino Star Battle as part of the 2014 24-Hour Puzzle Competition.
So at least three puzzle authors all happened to construct pentomino-themed Star Battle puzzles last year, and all three happened to choose the fairly-standard 10x10 grid size, (forcing the puzzle to include only 9 of the 12 possible pentomino shapes). Matúš's comment was "I hope someone will try to include all twelve pentominoes" and I couldn't resist the challenge.
And it was an interesting challenge since putting 12 pentominoes into a Star Battle requires a 13x13 grid. That's not too much of a problem in and of itself, (my Star Duel used a 15x15 grid, for example). But with this particular theme, as the puzzle grows the total area of the pentominoes grows linearly, while the total puzzle area grows quadratically. In my final puzzle there are 12 regions of size 5 and then one giant outer region with 109 cells. But all 13 regions each only contain two stars. So the real challenge here was to ensure that when solving the puzzle the stars in the huge region didn't get determined early, (causing a bunch of cells to be wasted and forcing the user to tediously mark off all of the unused cells).
Luckily, I think it just worked out. In all of my test-solving, the stars in the large region are among the very last determined.
Anyway, give this puzzle a try if you'd like. The large number of tiny regions means there are a lot of easy steps early on in the puzzle. But there are still a few more interesting deductions in store later on, (but nothing ever all that difficult in this Wednesday-level puzzle).
I should also thank Thomas Snyder for his editorial help. He found and fixed a small ambiguity in the first version of this puzzle that I submitted. I've since coded up a deductive Star Battle solver just to be able to verify uniqueness for puzzles I construct. But maybe I'll talk about that in a future post.
PS. If anyone is following closely, I neglected to mention my fourth puzzle when it was published a few weeks ago on a Friday. It's a Pentominous puzzle with almost no clues other than 12 F's, and I named it "F is for Fiendish". The title is a warning, and I think it deserves it. I think this is the hardest puzzle I've published so far. My Star Duel earned a longer estimated "Expert" time, (37 minutes compared to 20 minutes for "F is for Fiendish"), but that's mostly because Star Duel is so much bigger, (2 15x15 grids compared to a single 10x10 grid). The deductions required here are definitely harder to find.
My sister is really kind to do some of the initial testing of several of my puzzles. After I handed her a copy of "F is for Fiendish" one evening, she called me later that night to ask, "Can you email me a fresh copy of that puzzle? My husband and I have been trying it over and over and the paper is all disintegrating after so much erasing." That's a beautiful thing for a puzzle designer to hear---that someone is terribly frustrated with a puzzle, but still determined to stick with it and keep trying.
So if you want a challenge, give "F is for Fiendish" a try. There are logical steps that can be found at every point to solve the puzzle without needing any guessing or back-tracking, (but they may not be easy to find). Good luck, and happy puzzling!
Posted Wed 21 Jan 2015 09:49:58 PM PSTI just had my third puzzle published at GM Puzzles. Take a look.
This puzzle is a Pentominous puzzle, a really fun style which I believe was invented by Grant Fikes, a prolific puzzle contributor to GM Puzzles. To solve the puzzle, you simply need to divide the 10x10 grid into 20 pentominoes such that each of the given letters in the grid is contained by a pentomino of that shape, and that no two pentominoes of the same shape are touching.
My puzzle today is a Monday-level difficulty, meaning it's not too tough. And I think this puzzle in particular is a great introduction to Pentominous. When I first started constructing logic puzzles, I had a hard time making good and fun puzzles at an introductory level. Part of the problem is that any puzzle I make is usually harder than I expect it will be, (I think that's common for many beginning puzzle designers), so I'd often force harder deductions in the puzzle thinking that that was a requirement to make the puzzle interesting.
But this puzzle is probably the first time I made what I think it a really successful introductory puzzle. I've given this puzzle to a lot of people and people end up really liking the way the puzzle just sort of walks you through a series of forced pentomino placements. I've often heard feedback along the lines of, "Well, I still say that I can't do puzzles like this, but that one was actually a lot of fun," and that's really rewarding to hear.
So take a look if you're interested and let me know how it goes for you.
Oh, and I should comment on the words I ended up including in the puzzle's presentation. First, it's really tempting to include words in Pentominous puzzles. Second, it's really hard to pull them off. As a case in point here is an example puzzle by Tapio Saarinen where he started with 4 English words, but by the time he was done, only one remained as an actual word.
For today's puzzle, I set myself up for a bigger challenge, because I wanted to get a meaningful phrase, (but I only have the letters FILNPTUVWXYZ to work with---quite limited). The phrase I chose, "Intuit, Nix, Fix" is specifically the strategy I don't recommend using to solve puzzles. That is, you can just make a guess (intuit), then work with the puzzle for a while until you encounter a contradiction, then cancel your guess and try again (nix, fix). I suppose "guess and check" would have been an easier way to say that, but you can't spell that with the twelve Pentomino letters.
Anyway, a lot of people have been trained to use guess-and-check as a strategy because they've been solving puzzles generated randomly by computer programs, and many of these puzzles don't afford any other strategy. A huge benefit of solving good, hand-made puzzles like those published at gmpuzzles.com is that you don't need that strategy. Instead, there's a nice logical path from start to finish. So resist the temptation to guess, and go give this puzzle a try.
Happy puzzling!
Posted Mon 22 Dec 2014 06:23:57 PM PSTMy boys just finished this year's Christmas puzzle hunt, (known in our family as "The Code"). Read below for a summary of how things went, or check out the actual puzzles if you want to solve them yourself or just wonder at the amount of work my poor boys have to go through before they get any Christmas presents. I've also written up a brief history of the Christmas code linking to all the puzzles from previous years.
I'm really pleased with how things went this year. I scaled the difficulty back compared to last year, and that was good for everyone's sanity. It's easy to see the difference in just the numbers. Last year's hunt had 24 puzzles, 5 metapuzzles, and 1 final metametapuzzle. This year there were only 9 puzzles and 2 small metapuzzles. I was nervous the boys might think I did too little, but I think I actually got the difficulty just right this year.
They did solve it a few days before Christmas this year, but that's a good victory for them. Last year, there was a tough Battleships metapuzzle and the deciphering of a Playfair cipher that all came together only late at night on Christmas Eve.
Of course, the most important feedback comes from the boys themselves. There was a priceless moment last night as one-by-one, the boys in turn had the final flash of insight needed to solve the last clue. There's nothing better for a puzzle designer than getting to watch that "ah-ha" moment hit with its explosion of laughter. And that laughter is always mixed---appreciation for the disguise of the clue and a bit of disgust at not being able to see through it all earlier. And last night, it was a perfect cascade of these moments from one boy to the next. After the first one finally got it, just knowing it was possible was all the others needed to reach the same insight themselves. It was perfect.
This morning the boys reported that this year's code was the "best one yet". I think I've heard that three years in a row now. That's what gives me the motivation to do all this again. I guess I had better start planning now if I want to improve again next year!
Posted Mon 22 Dec 2014 05:33:15 PM PSTI've slipped into an accidental tradition of composing a puzzle hunt for my sons every year at Christmas time. We call it "The Code" and it's now one of the most anticipated events every December.
If you'd like to see some examples of what the puzzles are like, you can look at them here (or even try solving them yourself):
- 2015 Christmas Puzzle Hunt
- 2014 Christmas Puzzle Hunt
- 2013 Christmas Puzzle Hunt
- 2012 Christmas Puzzle
As one might hope, I believe my puzzle-designing skills are improving with practice. So hopefully the more recent puzzle above show some of my better work.
This tradition has become sufficiently involved that the history of The Code really deserves to be captured. Here's the story of how it all started, and how it's changed over the years.
On Keeping Christmas a Surprise: The Invention of The Code
One year, my wife and I were lamenting to some friends that Christmas gifts were losing their mystery at our house. Our boys were getting good enough at poking, prodding, and predicting their presents that there weren't a lot of surprises left for Christmas morning. Our friends had had similar problems with their children, and we ended up comparing notes on things we had done to keep gifts secret.
One obvious tactic is to disguise a gift while wrapping it. This technique has already been developed to an artform by our boys. They love giving each other a large, wrapped gift which, when opened reveals a smaller, wrapped gift inside. Then, like a set of matryoshka dolls, that gift reveals a smaller, and smaller gift. In our family, as soon as this unwrapping process is started, everyone knows what the end result will be. The final few layers are so tiny that there's no room for boxes anymore, just many, many layers of different colored gift wrap and excessive amounts of tape. These last layers take a tremendous amount of effort to get through. And the reward for all of this hard work of unwrapping? Inevitably, it's a single penny. We don't recall who wrapped the first penny, but it's now a standing tradition where the boys try to outdo each other each year by disguising a penny in the most elaborate way possible.
Clearly, we're not willing to go to such heroic efforts to disguise every gift we wrap. We had experimented with waiting to put the Christmas gifts out under the tree until just before Christmas, but that wasn't much fun. It robbed the boys of a lot of the fun anticipation of seeing the gifts under the tree throughout December.
Our friends shared an idea that had worked well in their family. What they did was not write names on any of the gifts, but instead wrote a single number on each gift indicating the recipient. And the method for choosing the numbers was selected in a new and unpredictable way each year. For example, one year my friend (who happens to be a dentist) wrote the number of teeth that each child had lost on their gifts.
We thought this was a great idea, and we decided to give it a try. And none of our Christmas gifts have had any of the boys' names on them sense, (though they've had just about everything else possible). Read on for a rundown of what we have done for the code for each year.
The Early Years: Locking the Code up Tight
For the first year, we adopted a very simple strategy. We wrapped each boys gifts in a unique color of wrapping paper. We didn't explain anything, and when the boys asked why none of the gifts had names on them, we were evasive. Then, on Christmas morning, we told them which color of gift wrap corresponded to each boy.
The second year, the boys correctly predicted that we wouldn't use the same technique, and they immediately set about trying to crack "the code" for the Christmas presents. They started convening secret meetings to discuss theories. We discovered some of the notes from one of the meetings and found that they had constructed an entire table mapping out the following variables for each gift under the tree: Wrapping paper color, Number of bows, Colors of bows, Picture on the tag, Names on the tag. You see, this year, I did put tags on the presents, but instead of their names I wrote the names of characters from nonsense poetry: "To: The cat; From: The fiddle", "To: The cow; From: The moon", "To: The dish; From: The spoon", etc.
Their table was fairly effective. They were able to eliminate many variables that couldn't work. If there were more colors of wrapping paper tan children, they assumed that could ignore that. If there were only one or two bows per present, they assumed that couldn't identify one of the four boys. Fortunately for me, they didn't crack the code that year, but only because their table hadn't accounted for the color of ribbon on each present.
By the third year, I realized that I had to put more thought into designing the code. Here was an active group of intelligent agents determined to find the information I was trying to hide. I was careful this time to imagine every variable they could track, and ensure that each variable appeared with four different values, evenly distributed among the presents. I also ensured there was no correlation between any of the variables. Grouping the presents by wrapping-paper color, bows, ribbons, or anything else would always yield four entirely different sets of presents. (So yes, this meant that now my wife and I needed to consult our own table before we could know how to correctly wrap each gift).
Then, for the actual information, I chose two variables I thought they would never track. We carefully folded the flaps on each gift either in the same direction on each side or in opposite directions on each side. Then we either folded all cut edges away to leave clean creases, or left the raw edges exposed. This gave us four sets of presents: Matching flaps creased, Matching flaps raw, Opposite flaps creased, and Opposite flaps raw.
Of course, the boys never even looked at the flaps, and all of their attempts to find logical groups were foiled. When I revealed the answer on Christmas morning, I was smug, thinking I had "won" by creating a code they couldn't crack. Of course, the boys called me out saying that what I had done was totally unfair. (How could it have been unfair I thought? This was a game that I had invented myself?) But the boys were totally right. My problem was thinking that this was a game, when in fact, this should have been a puzzle.
Years later, I read the book "Puzzle Craft" by Mike Selinker and Thomas Snyder. In the introduction, Mike Selinker describes the lesson that my boys were teaching me. He says that a game is a contest with two equal sides and the outcome is in doubt, (either side has a roughly equal chance to win). In contrast, a puzzle is a contest with two wildly-unequal sides where the outcome is never in doubt, (the weaker side will always win). When I treated The Code as a game, it wasn't fun for any of us. The odds were stacked too much in my favor---I could always create an impossible-to-solve puzzle, but who has fun with a puzzle that's impossible to solve? That just leads to frustration and giving up. A good puzzle, in contrast, has plenty of frustration, but enough fun and reward that the solvers stick it through to the end. So I needed to learn to create a puzzle.
The Code Today: The Code as a Puzzle
My boys taught me that the code needed to be fair. That is, they needed to be given enough information to be able to solve the code. There could still be lots of deception and trickery, but they needed to know that with perseverance, patience, and creativity they could actually find the answer. They also gave me a second ground rule: The solution to the code must be relevant and interesting. A final answer of "you get the presents with the matching flaps with the raw edges" doesn't cut it. Instead, the solution to the code should actually point to the boys themselves. Basically, they were telling me "Design us a puzzle", and "Make it a good puzzle", and it just took me some time to figure that out.
Christmas 2012 was the first year I approached The Code as a puzzle. For that year, I labeled each present with nothing more than a small QR code. Scanning the QR code linked to a web page with a silly animated GIF, a solid-color background, some nonsense poetry in the title, etc. Somewhere in all of that was a hidden indication of who the intended recipient of each present was. So this was simply one puzzle, and a lot of obfuscation. I thought this puzzle would have been easier than it was, (a common problem for early puzzle designers from what I understand). But the boys had a lot of fun with it, and with some hints at the end, they figured things out by Christmas.
Christmas 2013 was the first year I stepped up and instead of designing just one puzzle, I designed an entire puzzle hunt. A puzzle hunt is a connected series of several puzzles. Many puzzle hunts also included "meta-puzzles" where the solutions to several puzzle combine to form a new puzzle. This was my first puzzle hunt to design and it included 24 puzzles, 5 metapuzzles, and 1 final metametapuzzle, (where the solutions to 4 previous metapuzzles had to be combined in another puzzle) That was probably over-ambitious for my first puzzle hunt, but it worked fairly well. There were a couple of bugs in the puzzles that I should have caught with better testing in advance.
One thing I was really pleased with was that I intentionally included every element from the previous puzzle, (animated GIFs, random background colors, nonsense poetry, etc.). But where in 2012 many of these elements were meaningless red herrings, in this year's hunt, every element was used in at least one puzzle. I was also happy that I included a mechanism for providing additional hints along the way. (And I did this in a way that I could revise those hints before the boys encountered them, so I could fine-tune the hints based on where they were getting stuck.) That was very useful, and I used that to my advantage again in 2014.
Christmas 2014 was my second puzzle hunt, so it's clearly now a new tradition that we won't give up for some time. (We'll just need to adapt things when some of the boys move out of the house, etc.). I do feel like I'm getting better at puzzle design, and the boys are still having a lot of fun solving this. I wrote up a blog post giving some of my feedback on how the solving experience went this year.
Posted Mon 22 Dec 2014 05:33:15 PM PSTI just had my second puzzle published at GM Puzzles. Take a look.
This puzzle is a Star Battle, which is an elegant and easy-to-learn puzzle type. All you have to do is place some stars into the grid such that exactly one star, (or more stars for larger puzzles), appears in each row, column, and bold region. Also, no two stars can be placed in adjacent cells, not even diagonally.
For the puzzle I published today, I took a couple of steps beyond the basic Star Battle formula. First, I made the grid quite large, (15x15 with 3 stars per row/column/region). Then I also provided two grids. Each grid has the same solution of stars, so you work back and forth between the grids to solve them both simultaneously. Finally, instead of dividing the regions into random-looking arbitrary shapes, I tried to make some recognizable pictures with the grids. If you click through above, hopefully you'll be able to recognize the shapes I was going for. This puzzle marks my first in a series of puzzles where I chose the name of the puzzle type as the theme for the puzzle. So, I drew a star battle for a Star Battle puzzle. And with dual grids, I named this battle a Star Duel.
Finally, I should point out that where my previous puzzle was published on a Monday, today's puzzle is published on a Saturday. The GM Puzzles website publishes puzzles that get increasingly difficult throughout the week. So if you've never attempted a star-battle puzzle before, I don't actually recommend you start with my puzzle from today.
Instead, you might start with this simpler star battle puzzle that I wrote as part of a Christmas puzzle hunt for my boys. It's a very gentle introduction to the puzzle type. If you try it, you can ignore the second grid with the C, H, A, and S regions. That was part of a metapuzzle included in the puzzle hunt.
Happy puzzling!
Posted Sat 20 Dec 2014 02:40:58 PM PSTI just had my first puzzle published at the Grandmaster Puzzles website. Give it a try.
I've really been impressed by the puzzles published at gmpuzzles.com. They do a great job of showcasing how much more interesting a logic puzzle can be when it's hand-crafted by a puzzle designer, rather than computer generated. I've also enjoyed learning many new kinds of logic puzzles, and decided that I wanted to try my hand at composing some puzzles of my own.
My first published puzzle is a Nanro puzzle, which is a puzzle type I only recently discovered. In a typical Nanro puzzle, the solver is presented with a grid that is segmented into regions of various shapes and sizes, with some of the cells labeled with numbers. The goal is to label additional cells with numbers so that all of the labeled cells form a single connected group, (with no 2x2 square of cells fully labeled). Additionally, within each region there must at least one labeled cell and the number(s) within a region must be equal to the number of labeled cells within that region. (That is, a region may contain one 1 or two 2s or three 3s, etc.) Finally, no two occurrences of the same number can appear adjacent to each other across a region boundary.
OK. So, I'll be the first to admit that the ruleset of Nanro isn't the most elegant. The rules can't be captured as succinctly as those of that other puzzle, ("no repeated numbers in any row, column, or region"). Fortunately, the solving experience is smoother than the description of the rules.
Most puzzles at gmpuzzles.com have some sort of "theme". Often there's an interesting visual presentation. Almost always there's a well-designed "solving path" of logical deductions that can be fun to discover. The idea is that there's something creative that goes into each puzzle that that distinguishes it from something computer-generated. And that creativity usually translates to a more interesting experience for the solver.
For this particular puzzle, the theme I wanted to explore was a "clueless" puzzle. That is, my puzzle contains a grid segmented into regions as typical for Nanro, but it doesn't include any initial numbers in the presentation. So that's something unique I think (as far as I have seen of Nanro at least). I'm not sure how successful I was at exploring the theme in this puzzle. Hopefully it's an interesting puzzle to solve, but I am a bit nervous that I'm bringing down the average quality of puzzles at gmpuzzles.com with this one.
I hadn't seen it prior to composing my puzzle. But before mine was published I found this spectacular Nanro by the inimitable Prasanna Seshadri. It's not entirely clueless, but as close as possible, (just one given number), but it thoroughly explores some of the ideas that my puzzle just touches briefly. Prasanna's puzzle has a really striking presentation that translates to a fun solving path. And it's obviously something that's been generated by hand not computer-generated, (at least given the state of the typical bland computer-generated puzzle today). So that's a great example of what gmpuzzles is all about and the standard I'll be aiming for with future puzzles.
So if you're interested in logic puzzles, take a look at my first puzzle. But even more, look around at the other puzzles at gmpuzzles.com. I doubt you'll be disappointed.
Posted Tue 25 Nov 2014 06:56:16 PM PST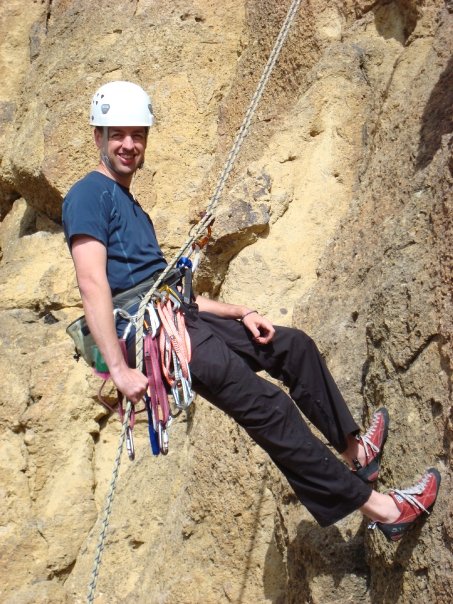
In June of 2008 I started rock climbing at a local gym, and instantly got hooked. I still can't fully explain the fascination I have with climbing, but it certainly includes an aspect of solving a three-dimensional puzzle. When I started, the easiest routes in the gym (graded 5.7) were difficult for me, but satisfying.
Within a few months I had already acquired a fair amount of gear, and I had the chance to climb outdoors (on toprope) with a good friend, (Scott DV), who was rediscovering climbing, (having climbed in Idaho years ago). We both found that there is some fine climbing to be had in the Portland area. We were just disappointed that we hadn't started sooner, because Oregon's wet season soon started interfering with outdoor climbing.
I got through the winter months by being lucky enough to find a climbing partner, (Scott D), willing to train with me 3 times a week, (and helping to motivate me to get up at ridiculously early hours to climb before work). We both took technique classes that took our climbing up a notch. By the time we were ticking off routes at 5.9, we took lead-climbing class and starting leading in the gym in January 2009.
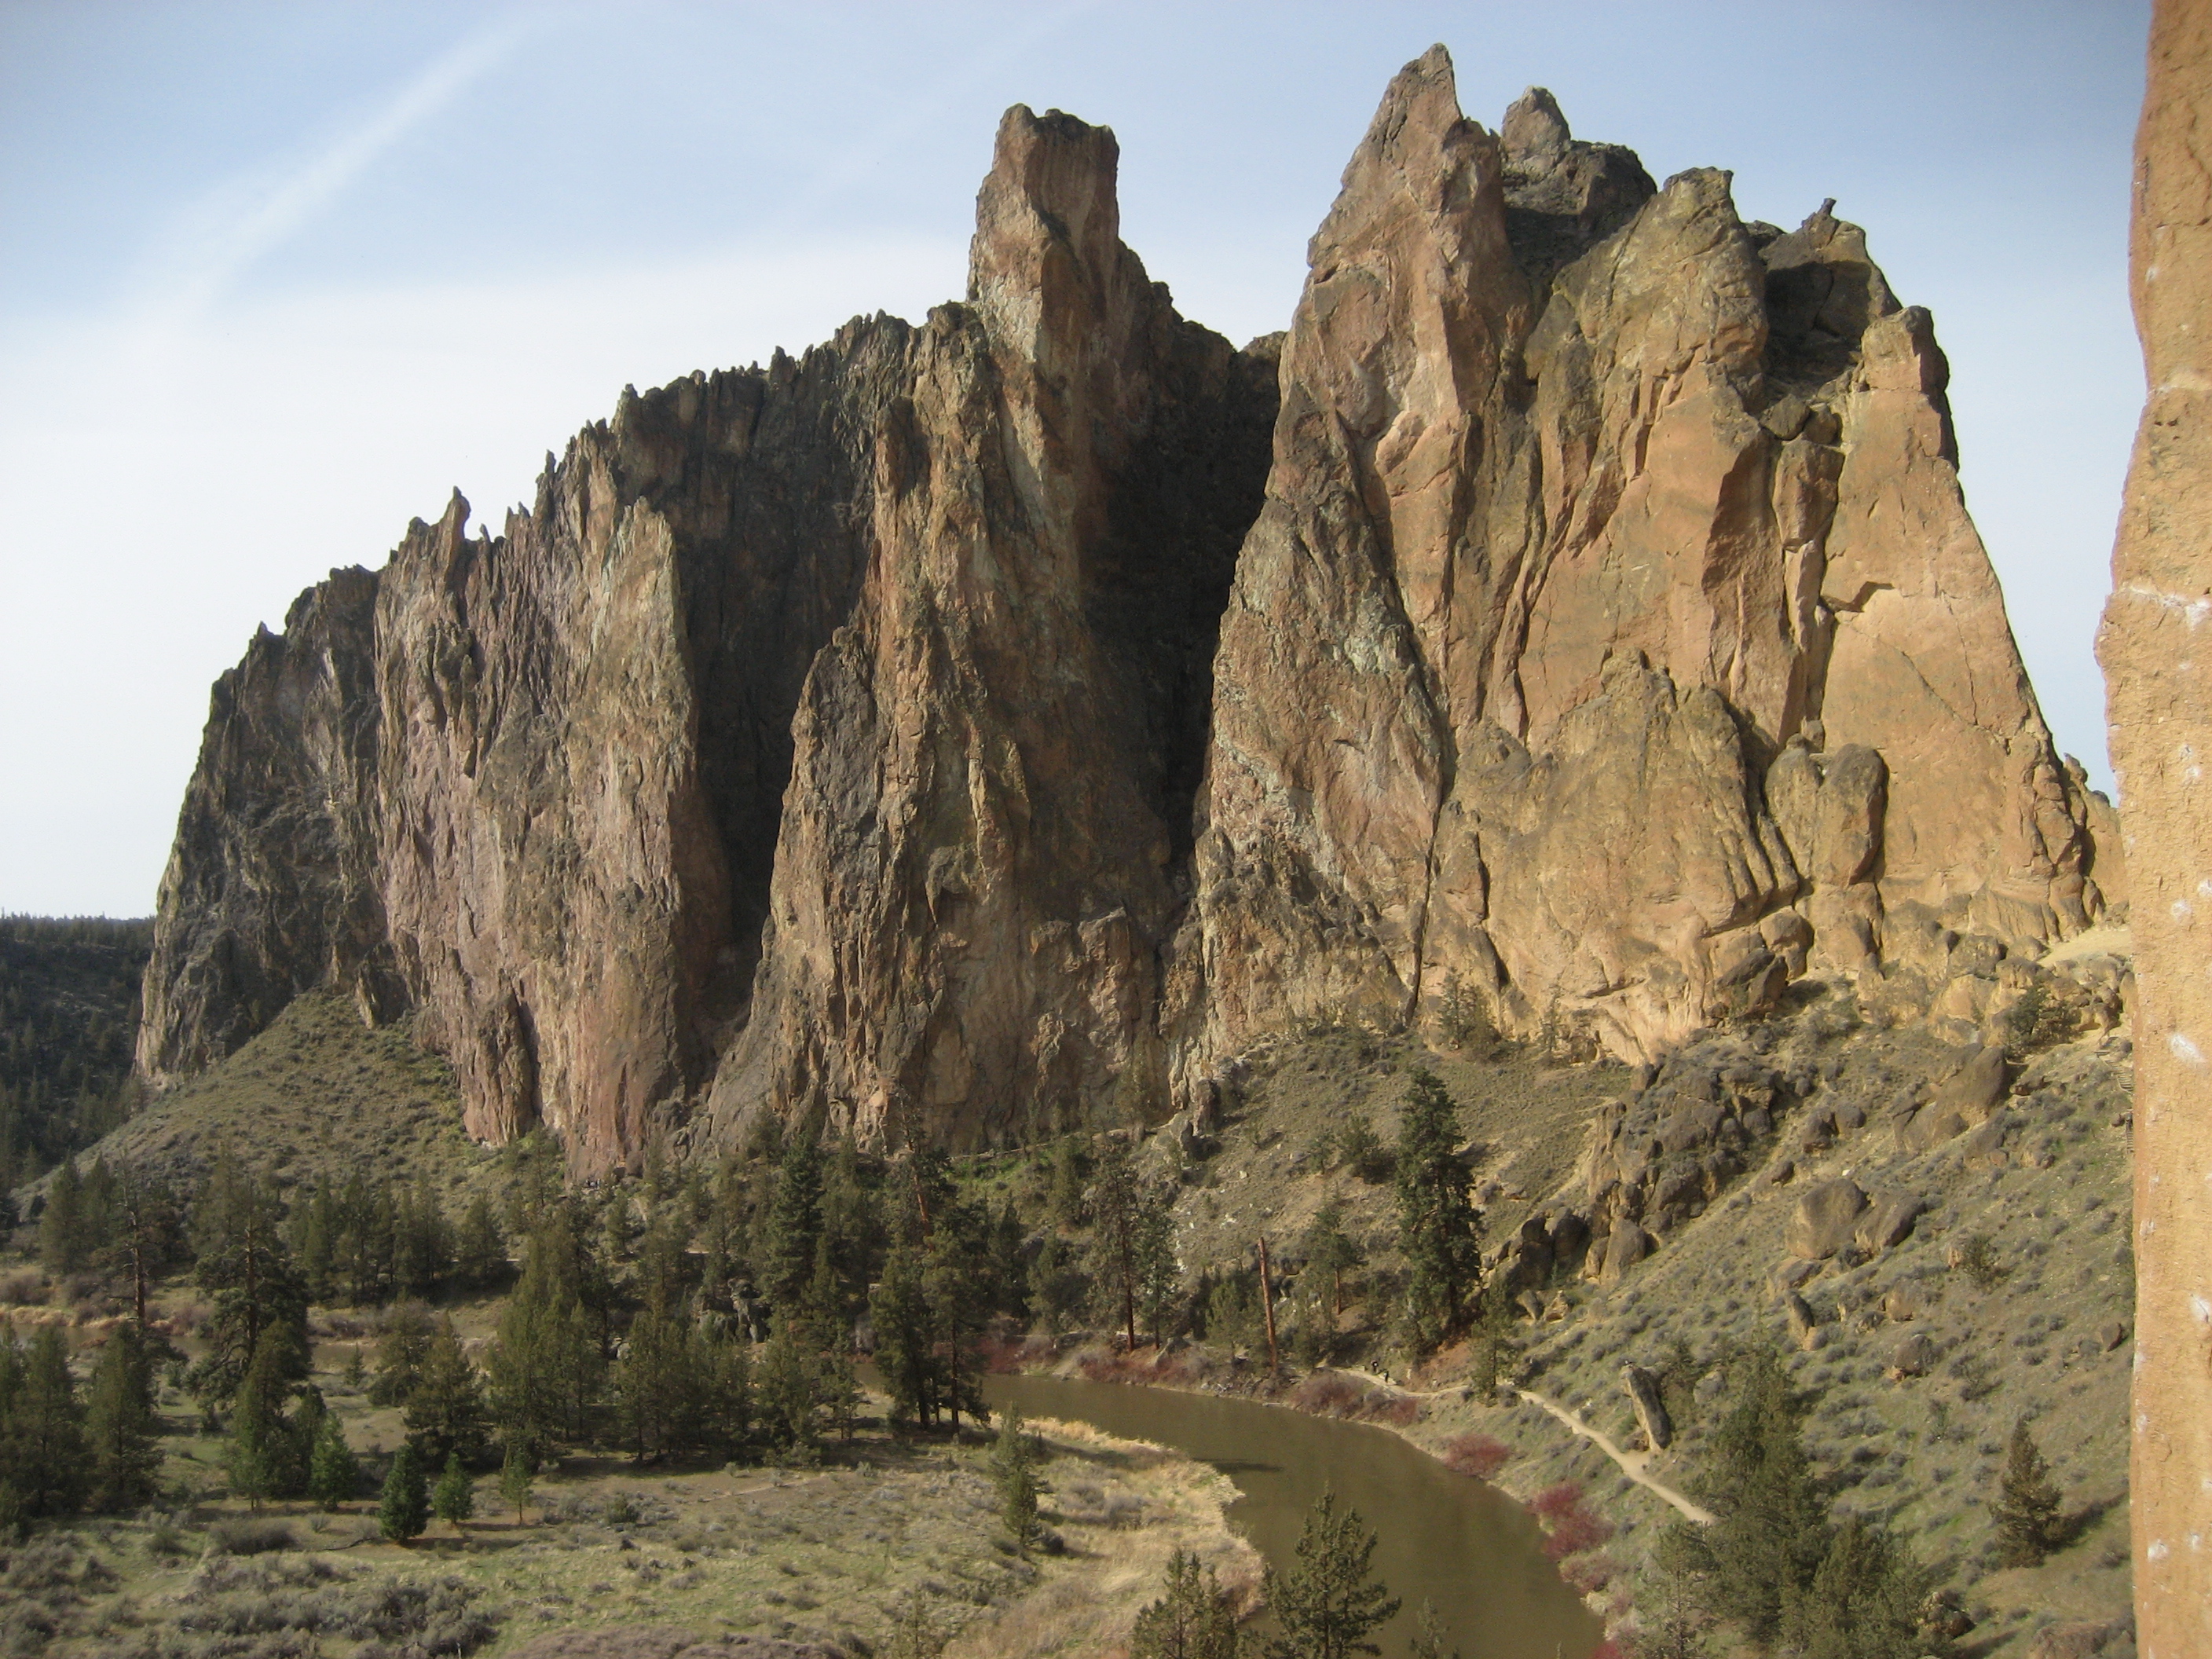
An unseasonably cold and wet month of March kept us in the gym, where we kept at our routine, leading at 5.8/5.9 and toproping at 5.10- (with several 5.10+ projects). In April, the sun finally came out and we took the first chance we could to get outdoors with a road trip to Smith Rock and some of the best climbing in Oregon. Our first experience leading outdoors was very satisfying, (and very different than in the gym), with each of us succeeding at 5.8 leads.
Back at the gym two days later, we decided that if we're going to start leading at 5.9, we'd better be working 5.11 in the gym. So we started working our first 5.11- project. It was grueling, (and we didn't make it through the crux without cheating with some weight on the rope), but we did get to the top, and it was a blast.
One of my favorite things about climbing is that the routes are graded on an open-ended scale. It's fantastic to know that no matter how much I improve there will always be routes ready to punish me and put me back in my place.
Posted Wed 22 Apr 2009 12:19:40 PM PDT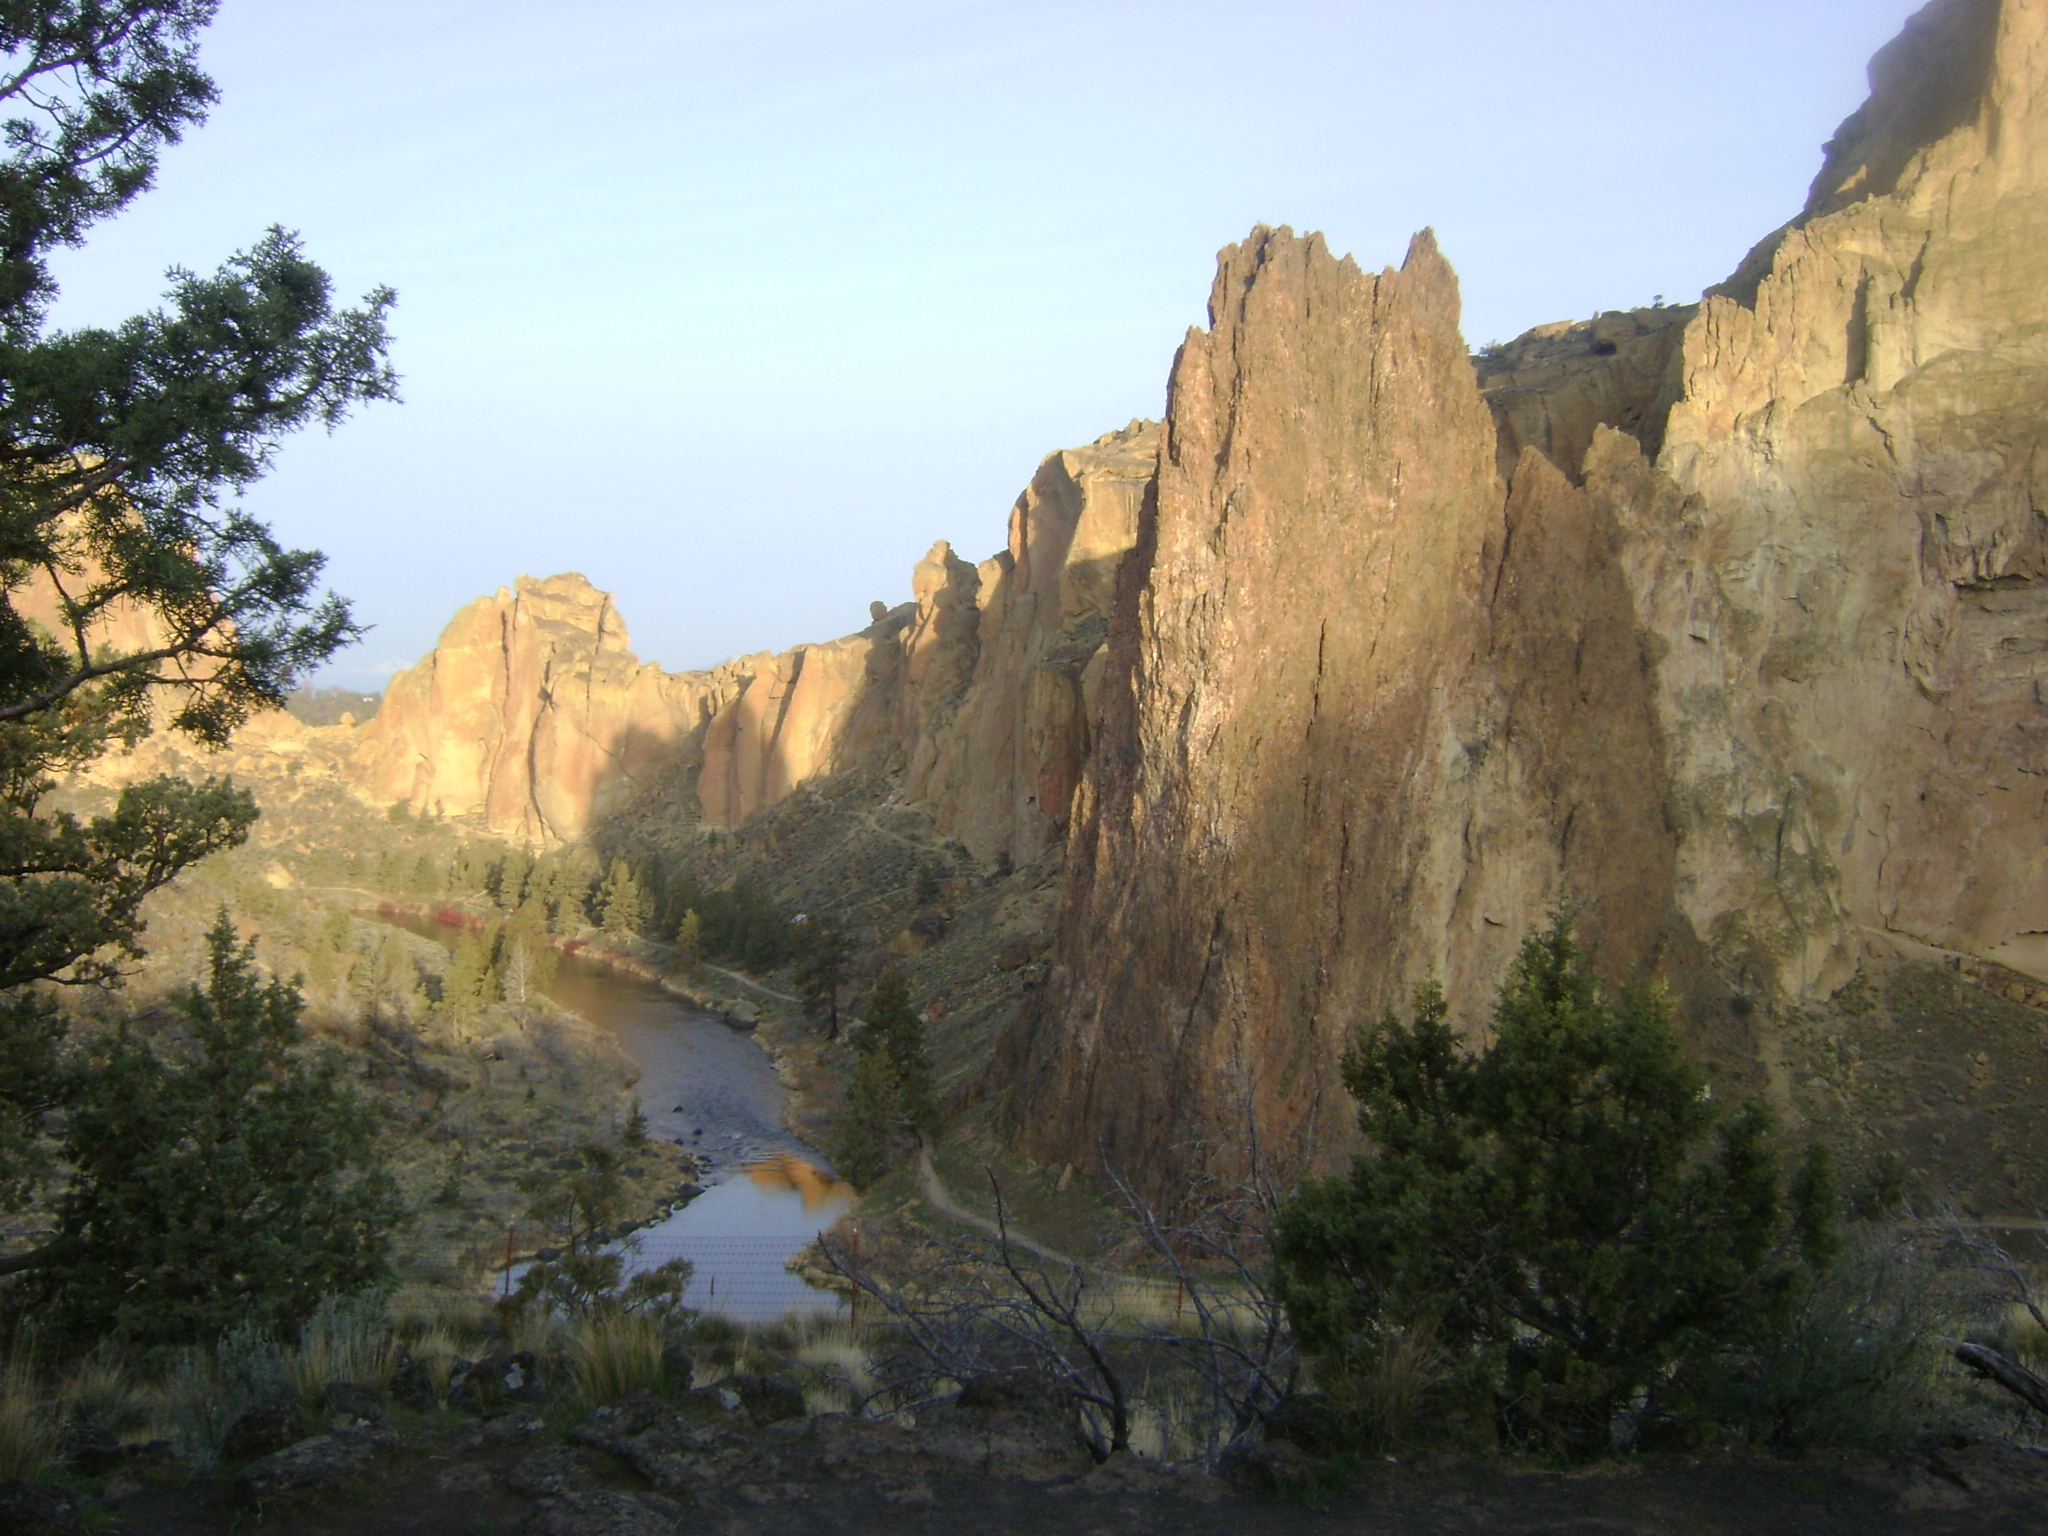
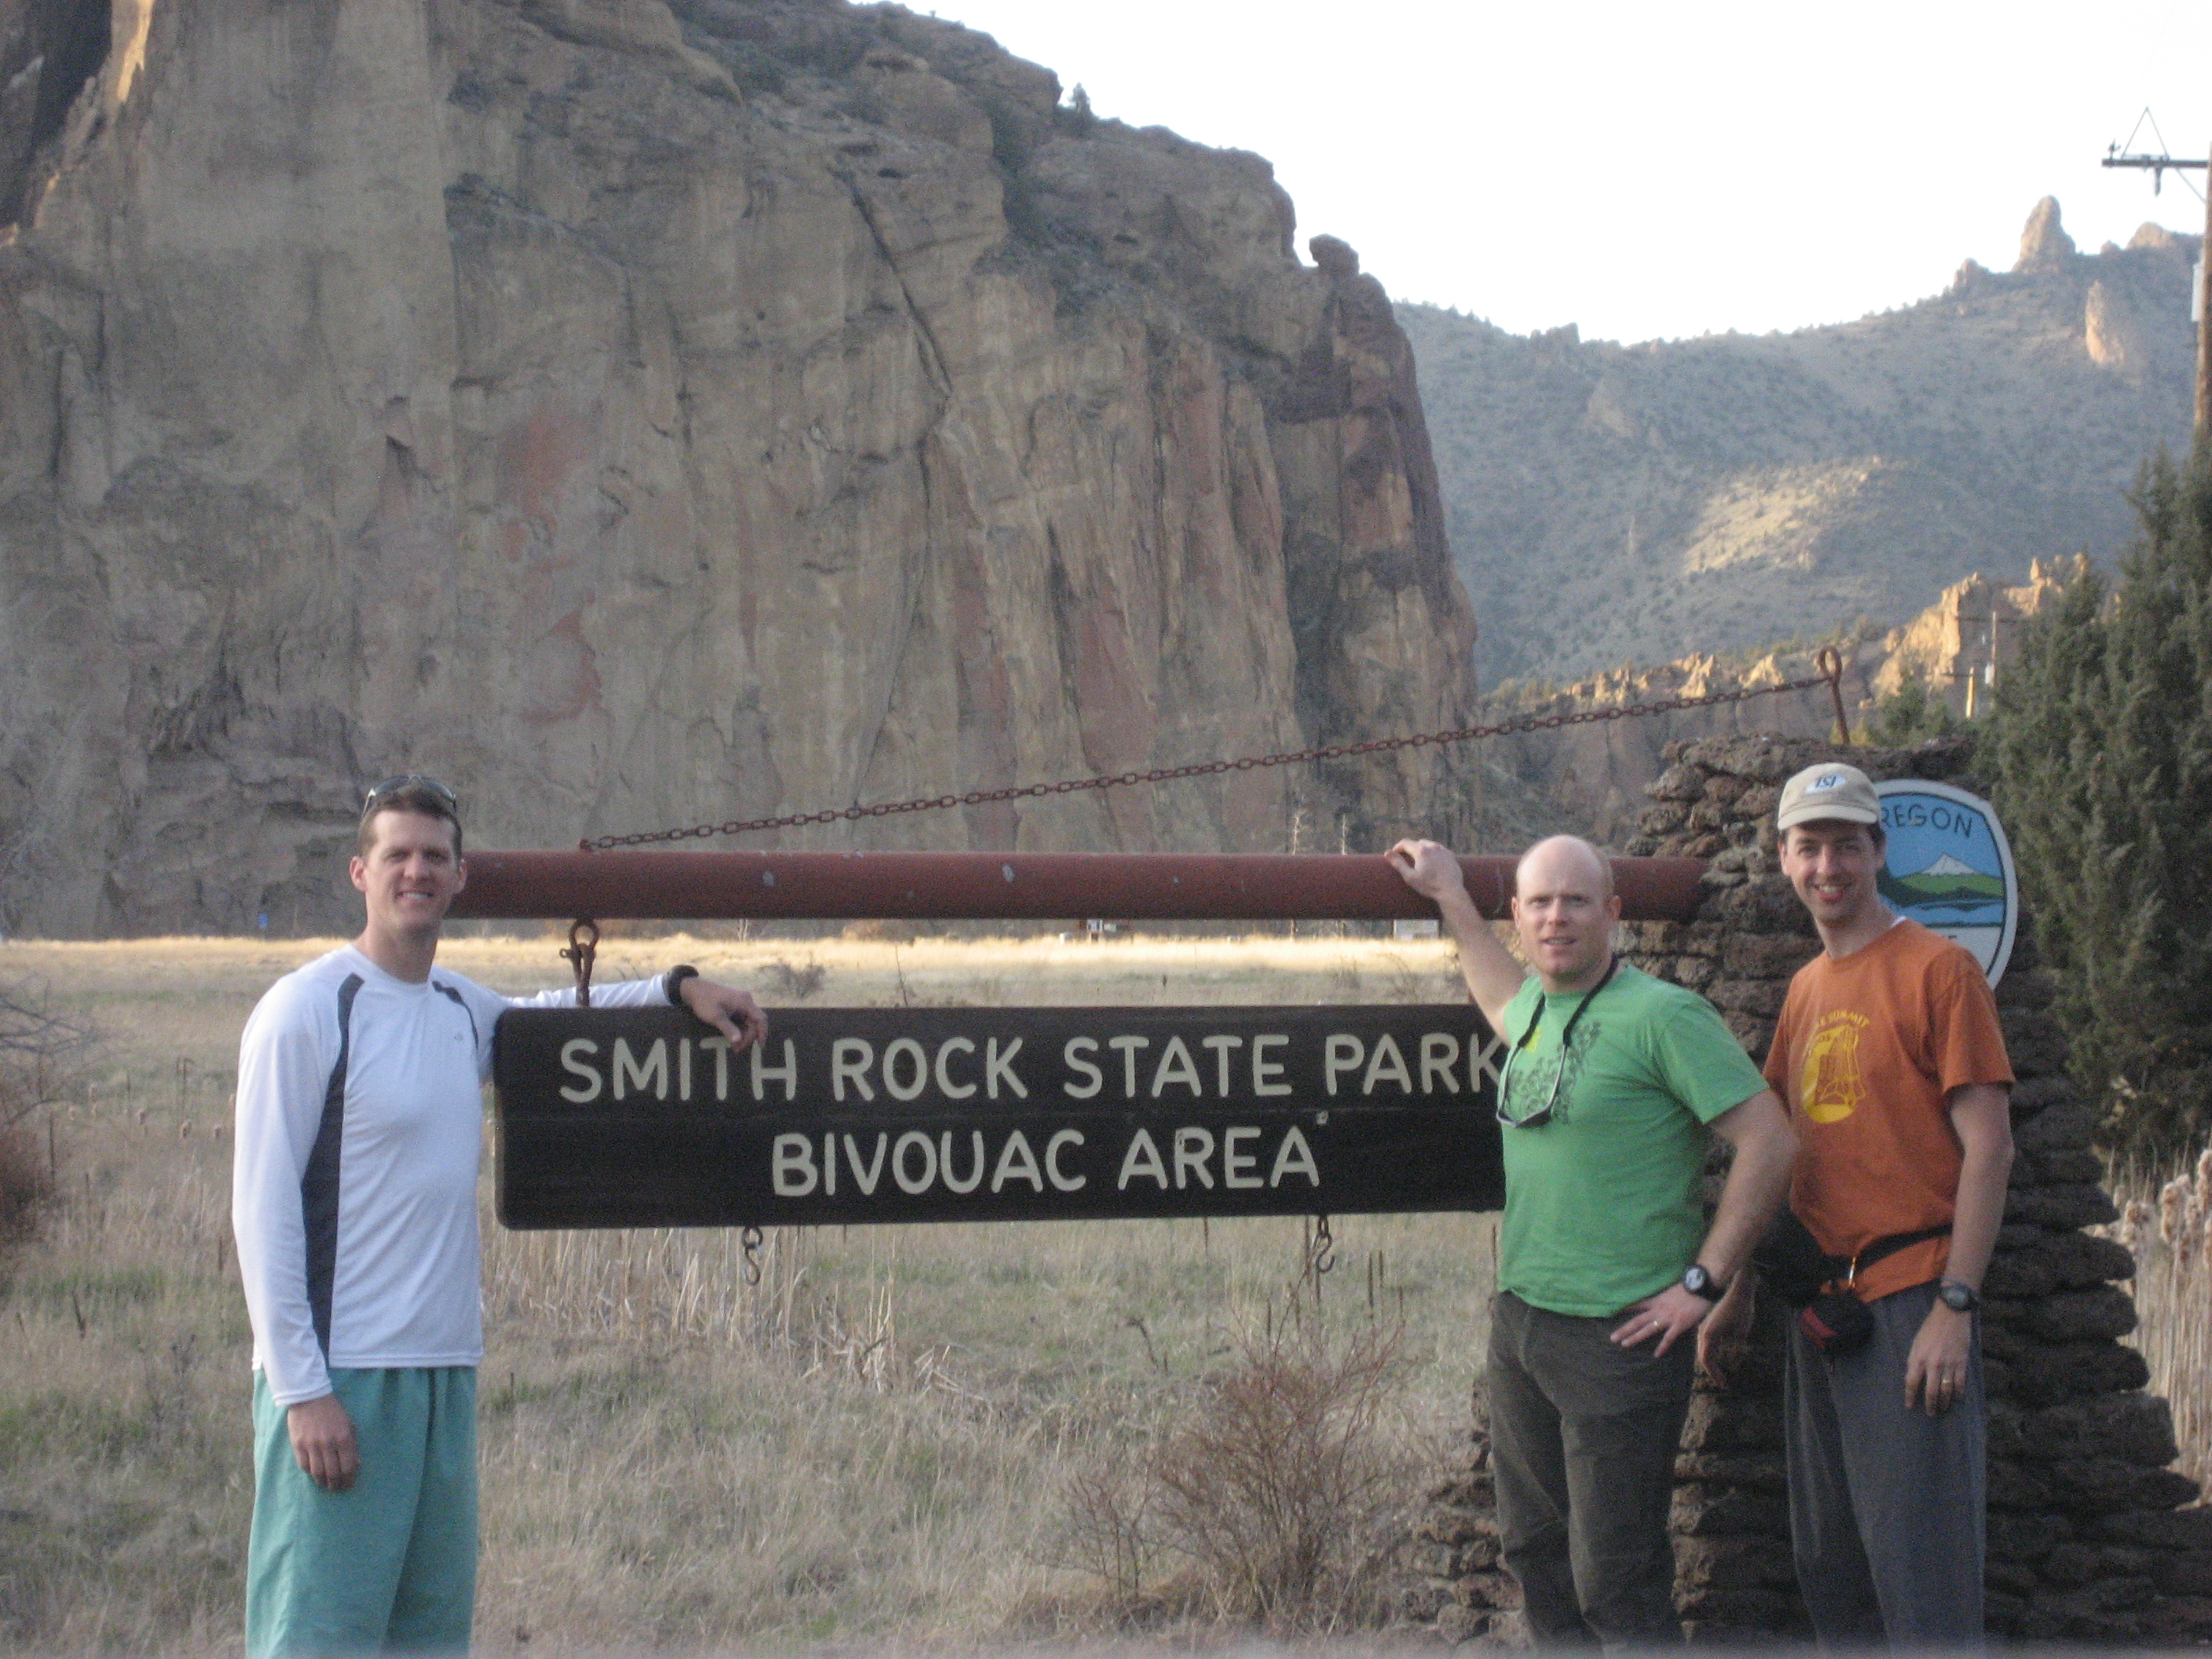
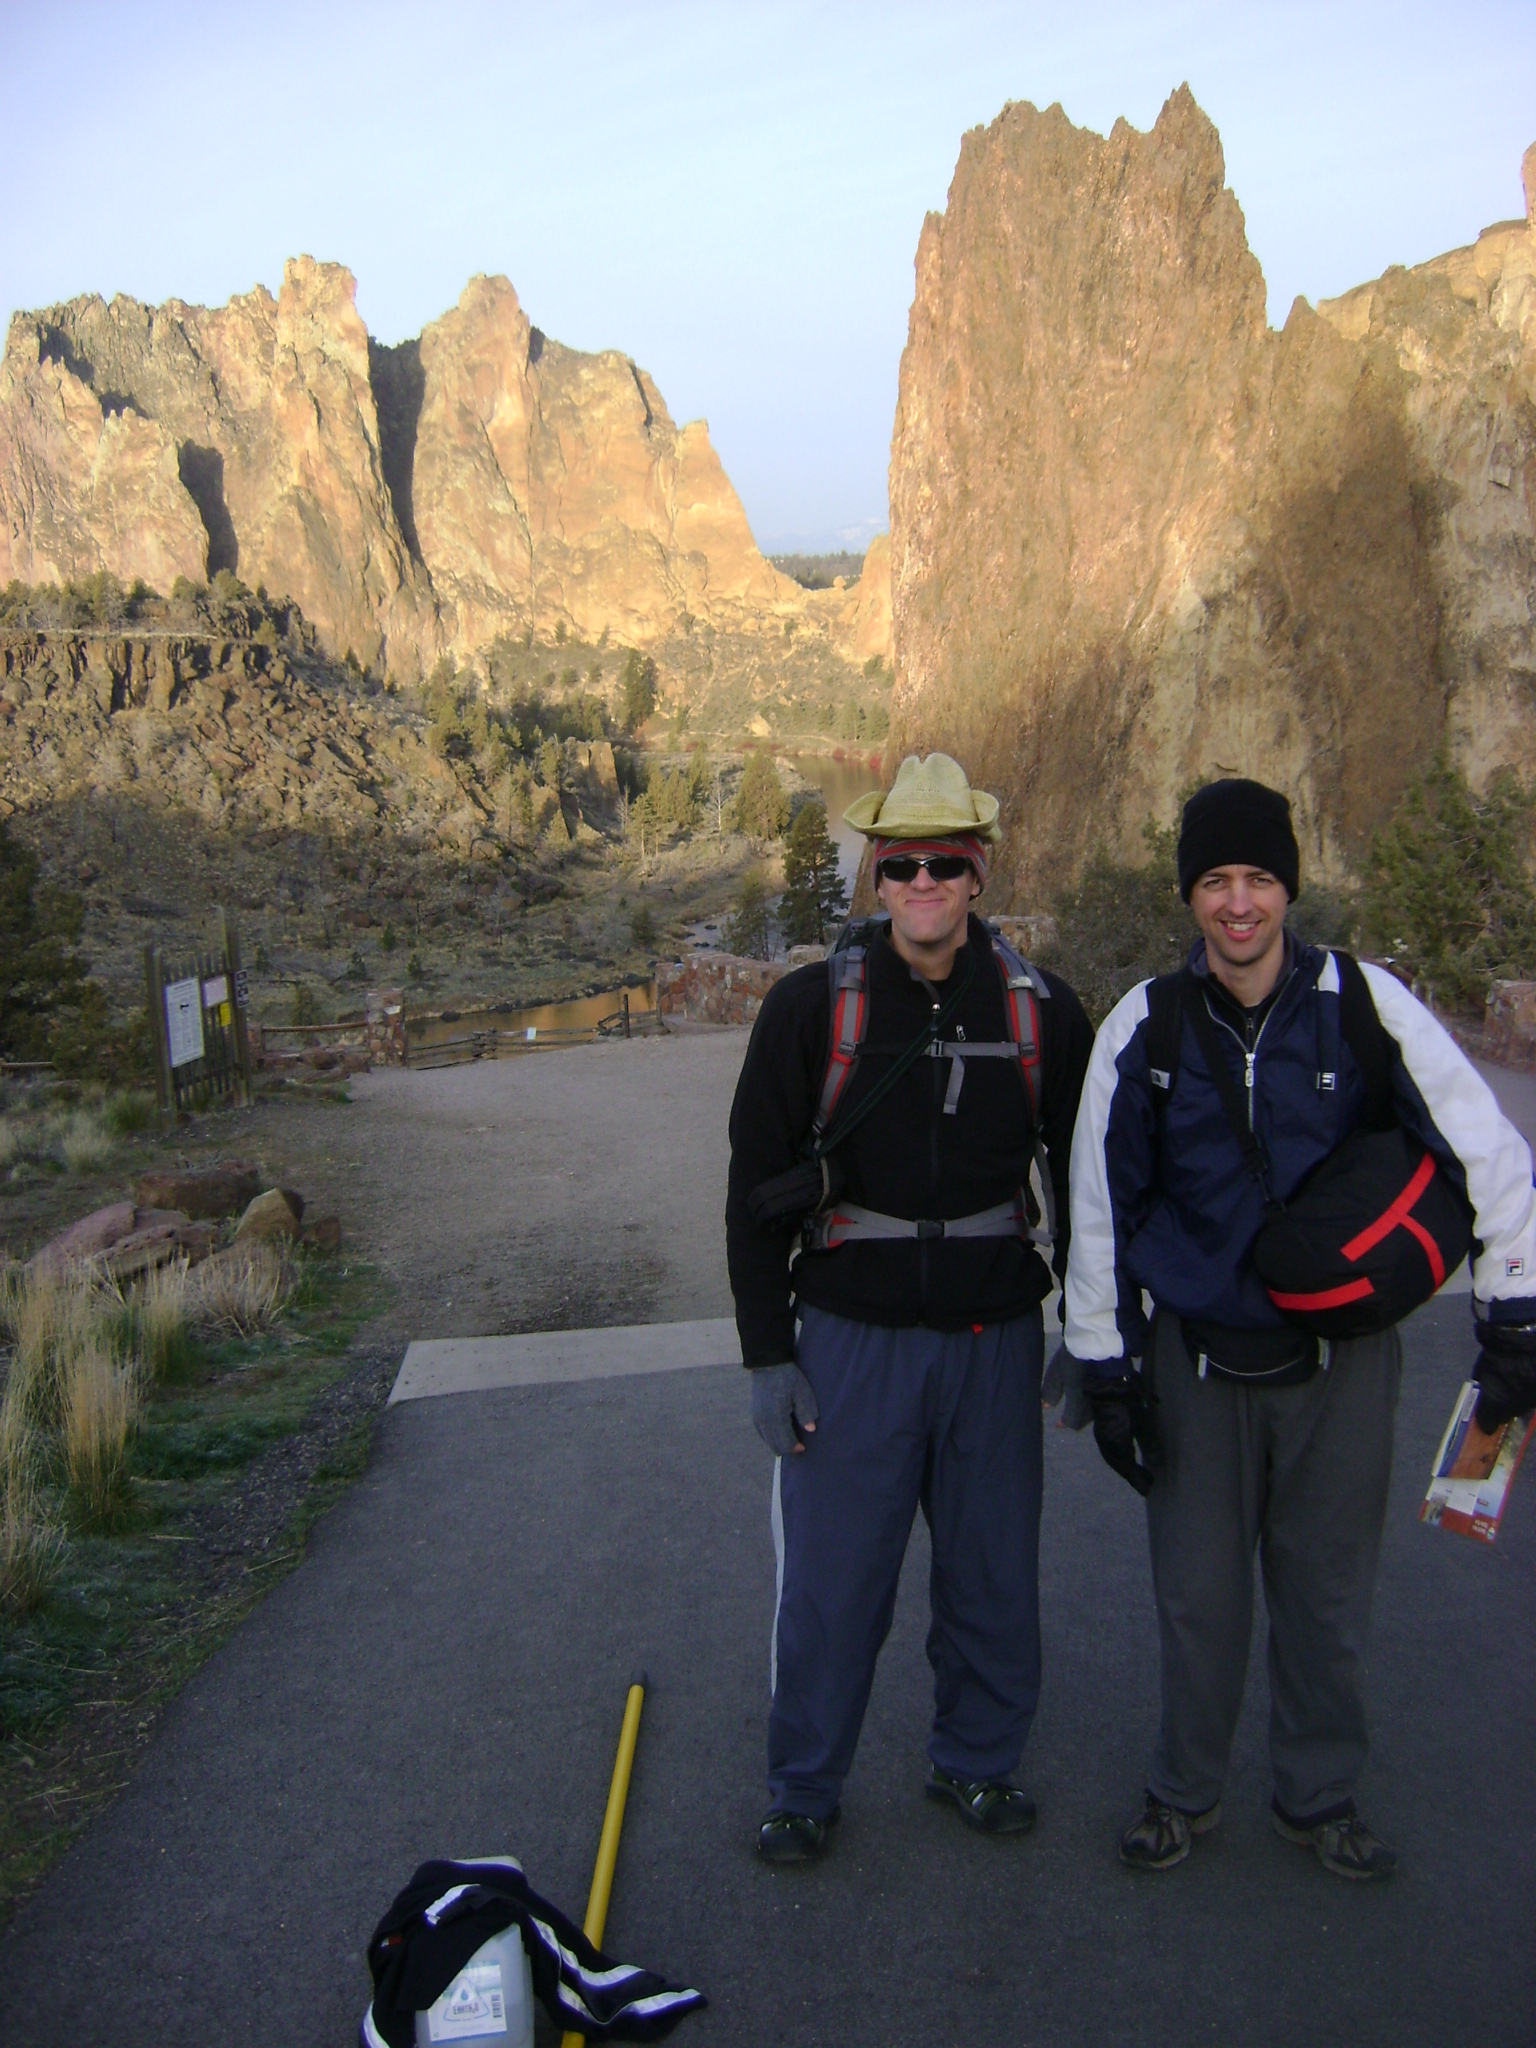
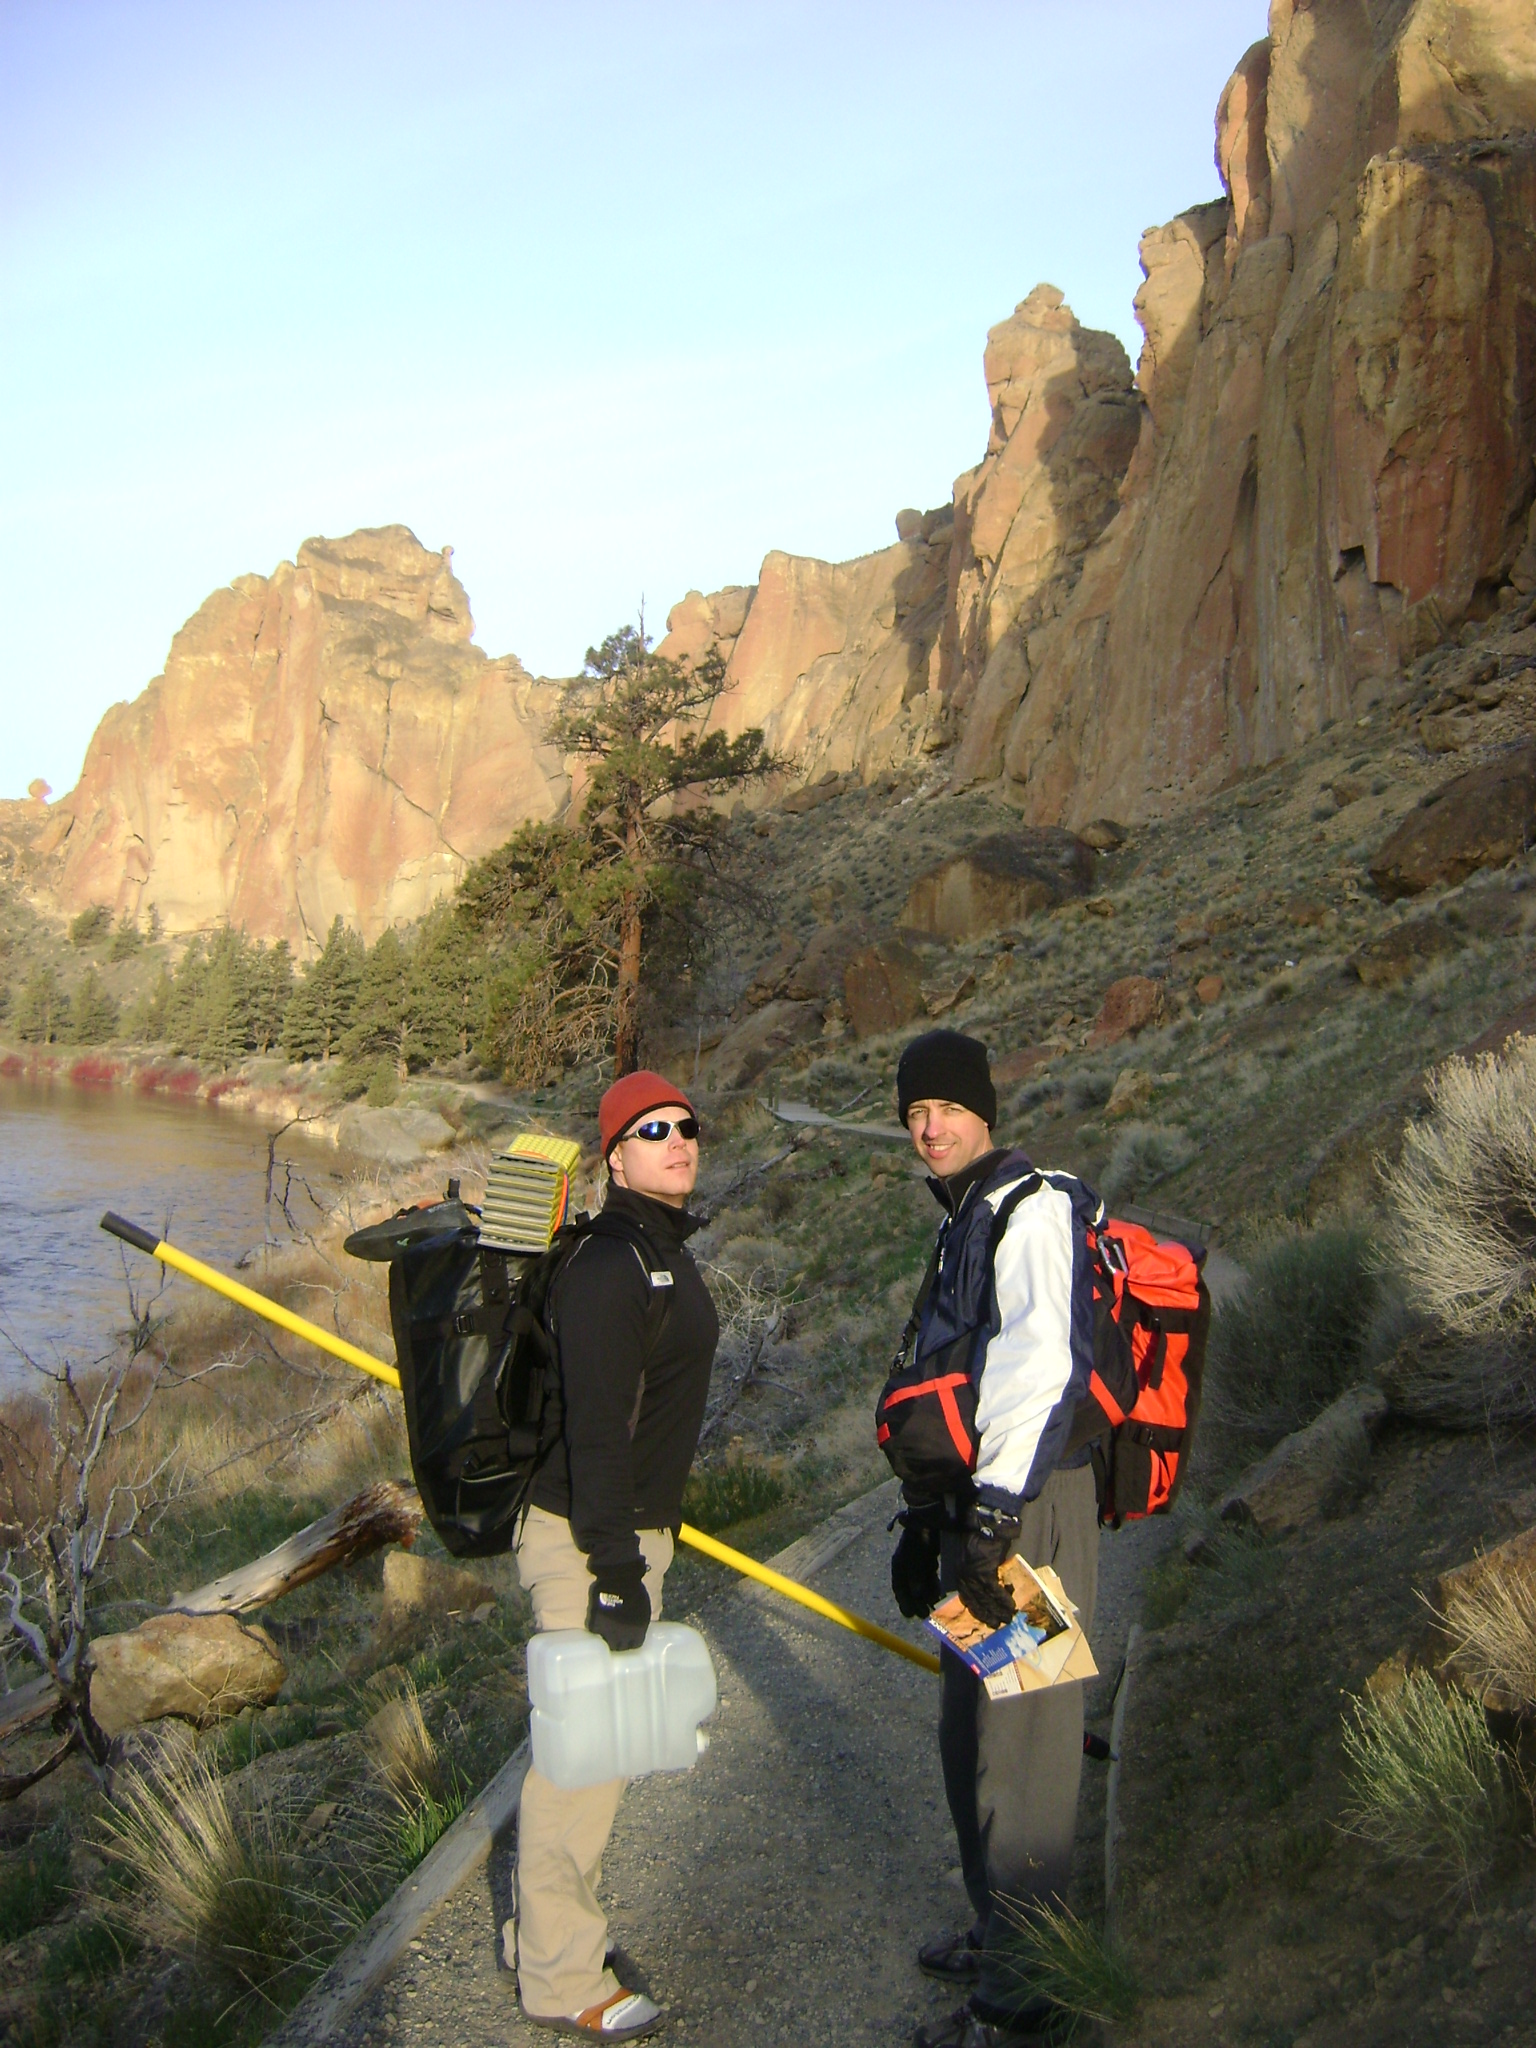
We had a fantastic time on our first climbing trip to Smith Rock. We drove down on Friday and camped at the base of the rock. Scott D. was anxious to beat the rush and set an alarm for 5:00 AM. When that alarm went off it was still quite dark and the temperature was just below freezing(!). The thought of ice-cold rock on bare hands was enough to keep us in our warm sleeping bags for a while longer, but eventually we did bundle up for the approach hike to the rock.
We got onto the rock at about the same time the sunshine did, and fortunately it warmed the rock very quickly. In fact, by afternoon we were desperate for shade to escape the heat. Large temperature swings are expected in the desert, of course, (note: next time, remind everyone to at least pack some socks). Getting to the rock early did work out quite well. We didn't see another climber for over an hour, so we had the chance to choose any route we wanted. Later in the day the most popular routes had lines long enough to make things feel a little bit like Disneyland.
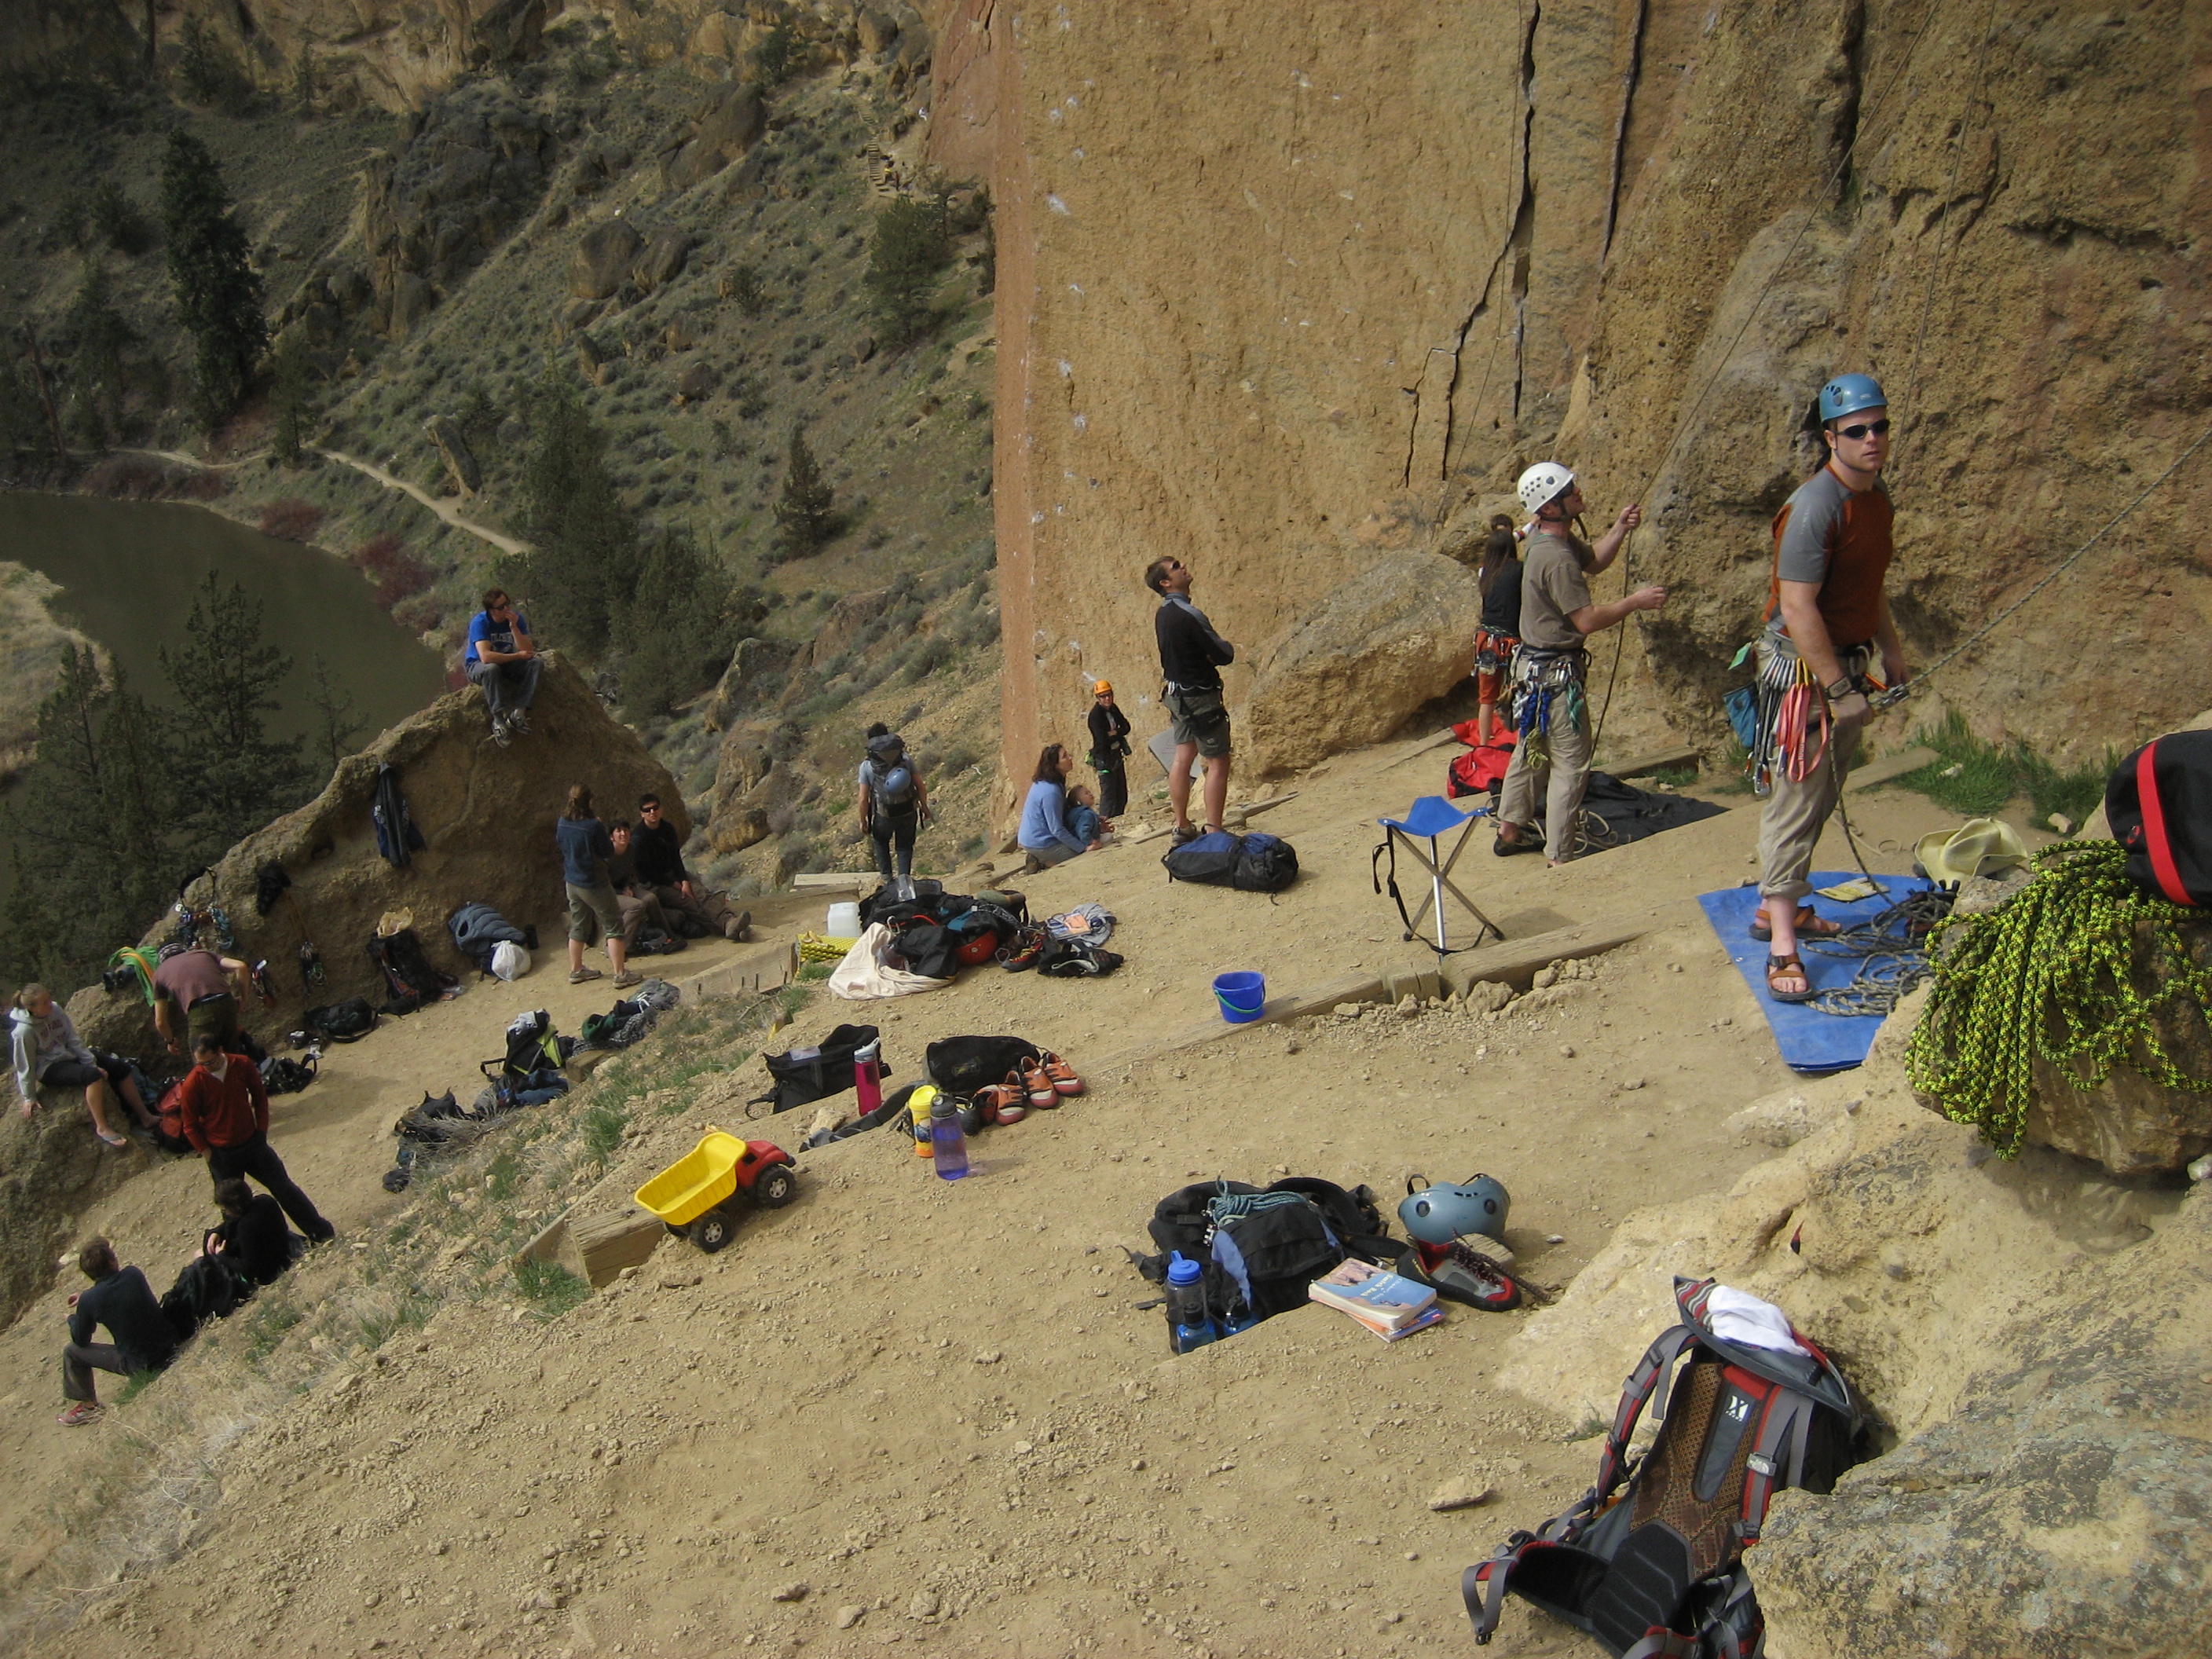
Since this was our first time leading outdoors we decided to start with the easiest routes we could find in the guidebook, and work up gradually. We found some nice beginner routes in the Cinnamon Slab area just before the Dihedrals. Everything went great, and we each had a successful lead behind us well before the mobs of climbers started showing up. We might have stayed more impressed with ourselves if we hadn't seen that the next climbers on our first route were parents setting up ropes for their 5 and 6-year-old children. Look close in the picture and you'll see that just behind Scott's belay stance there are a couple of kid-size shoes, and a tonka trunk. Ah well, a little humility might even be good for us, I suppose.
Leading on this rock outdoors was very different from anything we had done in the gym. The most obvious change is that there's not any tape showing exactly where to put your hands and feet. So we all found ourselves shopping around for a while at each stance, always looking to see if we could find better holds.
And for me, at least, the psychological difference between top-rope and lead was much wider outside than in the gym. That might have been because these routes were not very steep, so any lead fall would have certainly meant a fairly quick swing into some very rough rock. I didn't realize how much I was staining, over-gripping, over-thinking and neglecting technique until I got onto toprope of a route I had just finished leading. Suddenly I was relaxed, comfortable, and moving quickly and smoothly on a route that moments before had my leg shaking wildly. So I'll definitely need to improve my ability to relax, use good technique, and just trust myself.

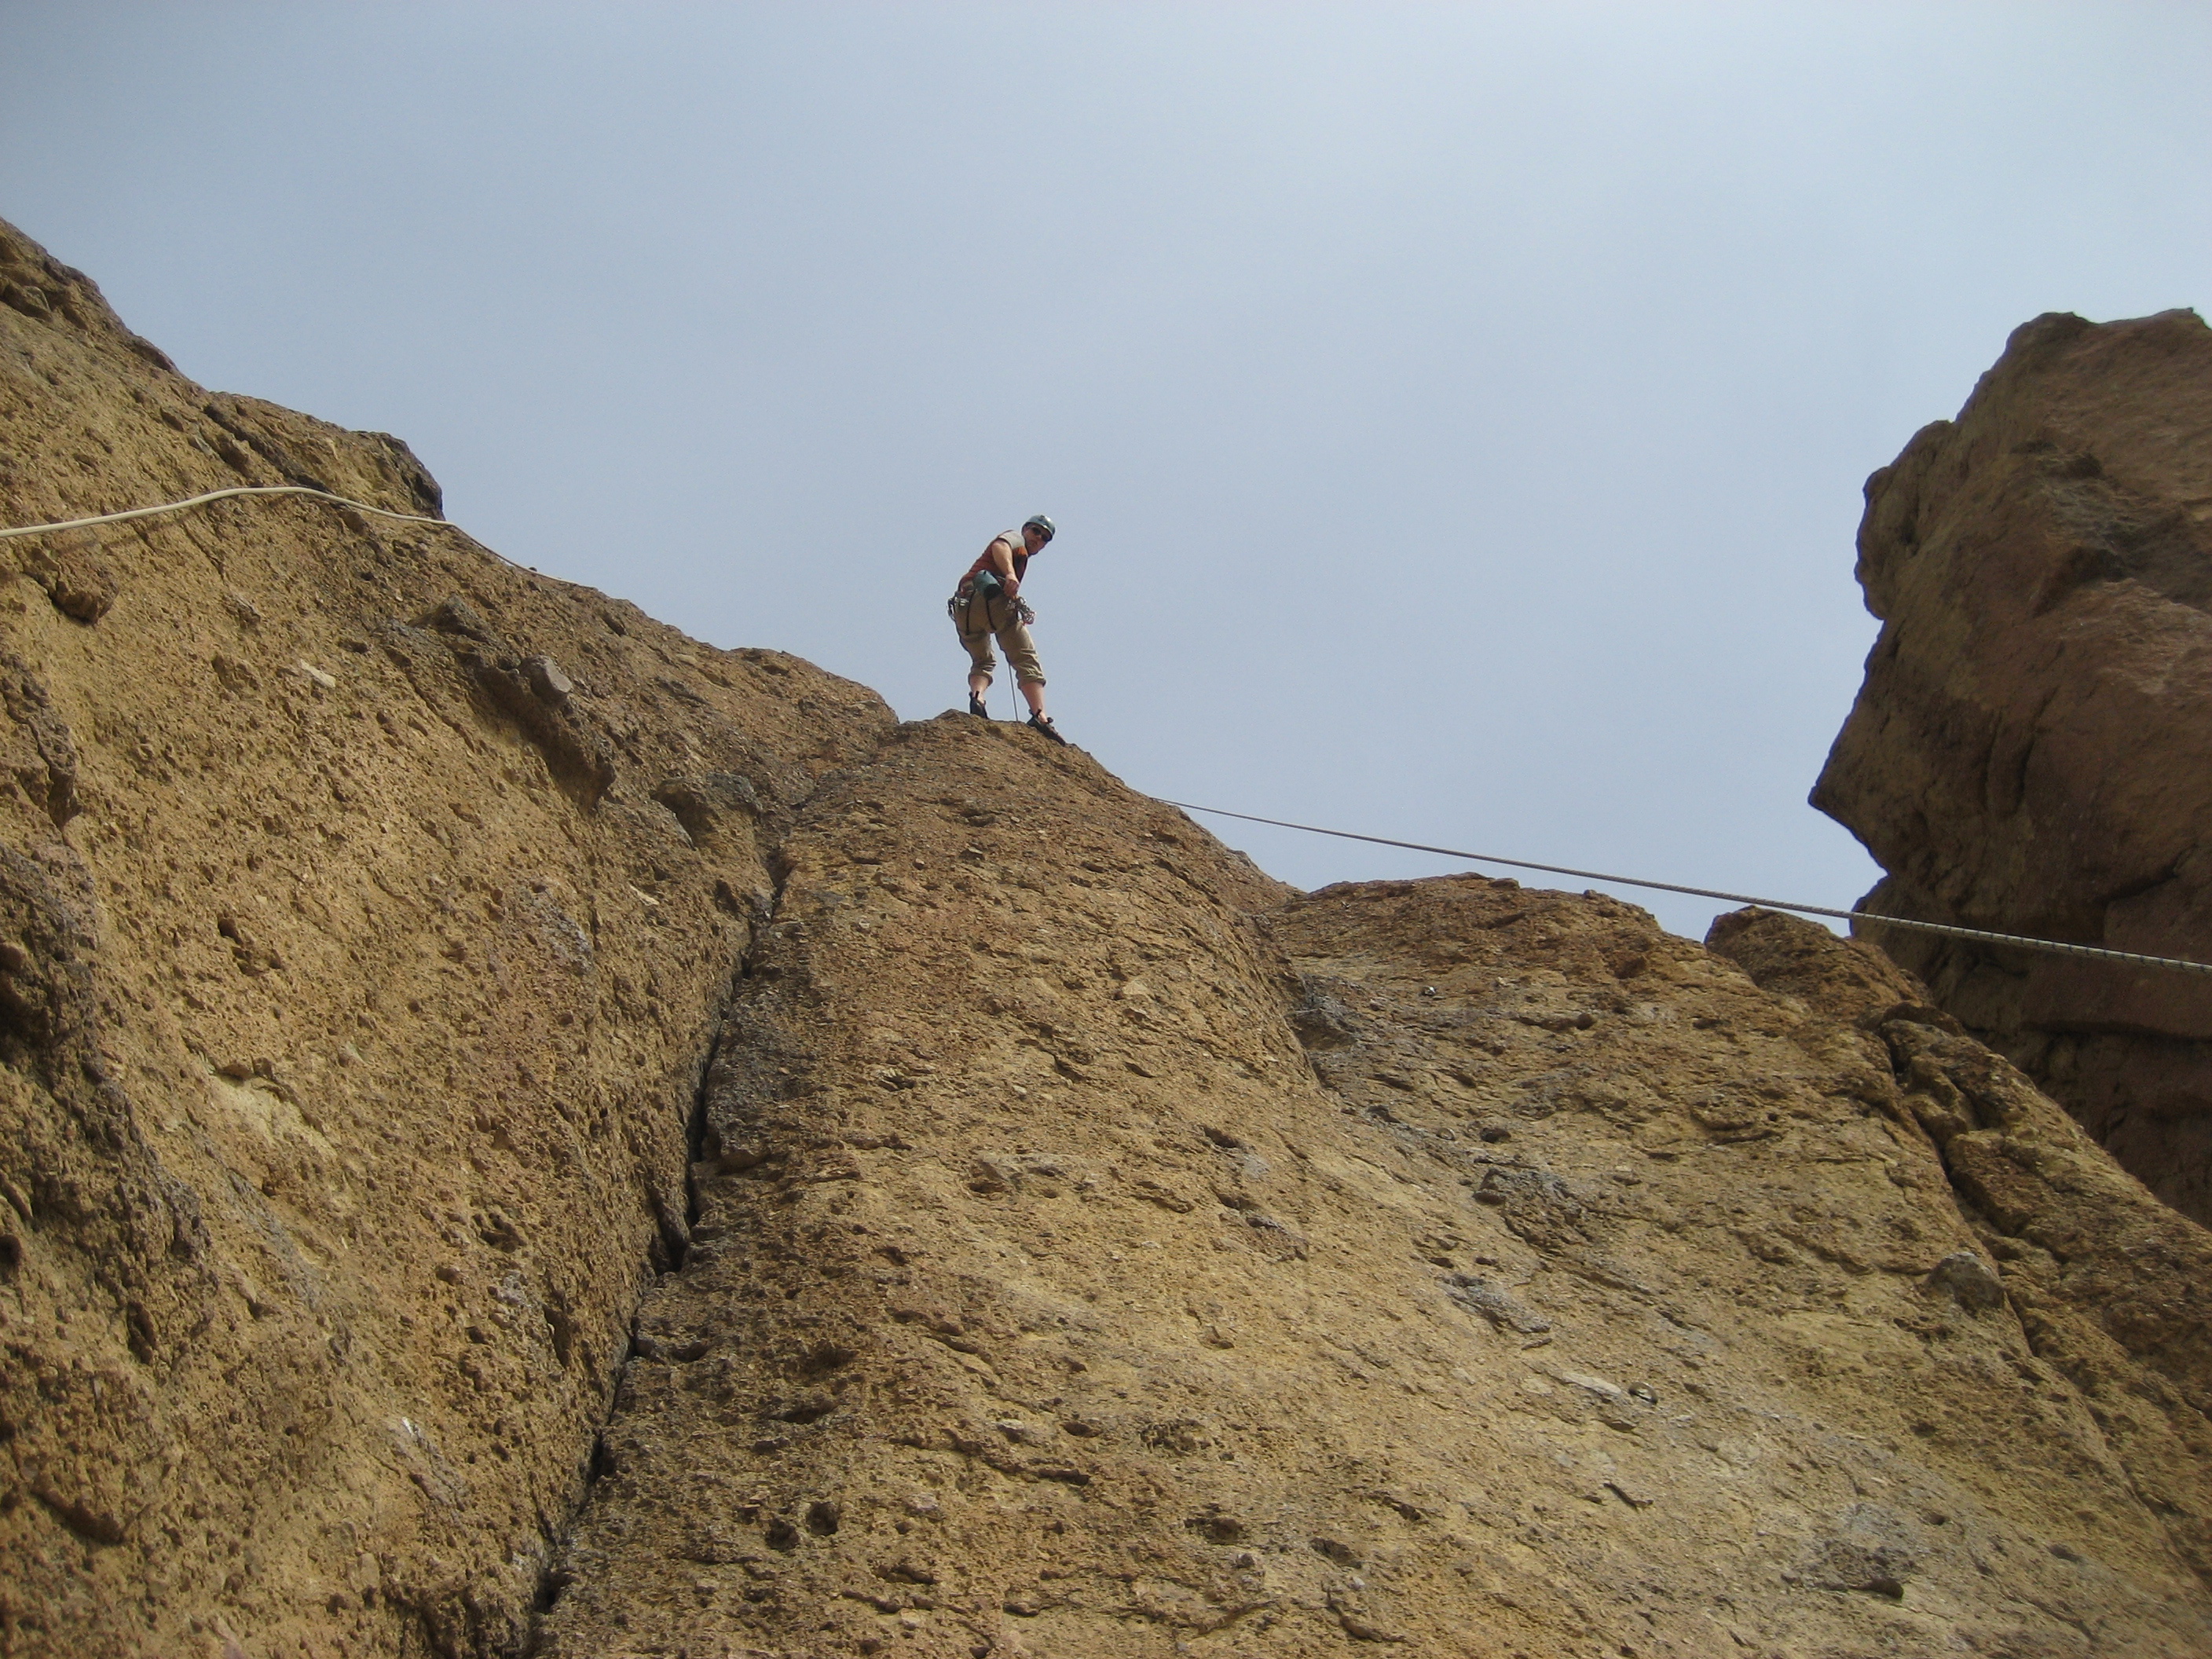
We stepped up the difficulty a bit when we moved over to the "Peanut" and confirmed the rumors that Smith routes have tough starts. On all of our routes in the morning the hardest moves were right at the beginning. We were glad that Scott D. brought his stick clip, (in spite of being afraid he might feel like a goober carrying around such a long pole), so we could get into that first bolt while it was still 15 feet up and have some ropes protection for the first tricky moves. And rather than seeing him as a goober, climbers nearby were grateful that Scott was happy to share his stick with them. Have I mentioned before at how friendly people seem to be in the climbing community? Everyone we met at Smith was very nice, and they didn't even make fun of us even though we were obviously beginners, (our gear was all obviously unused since it was still so shiny).
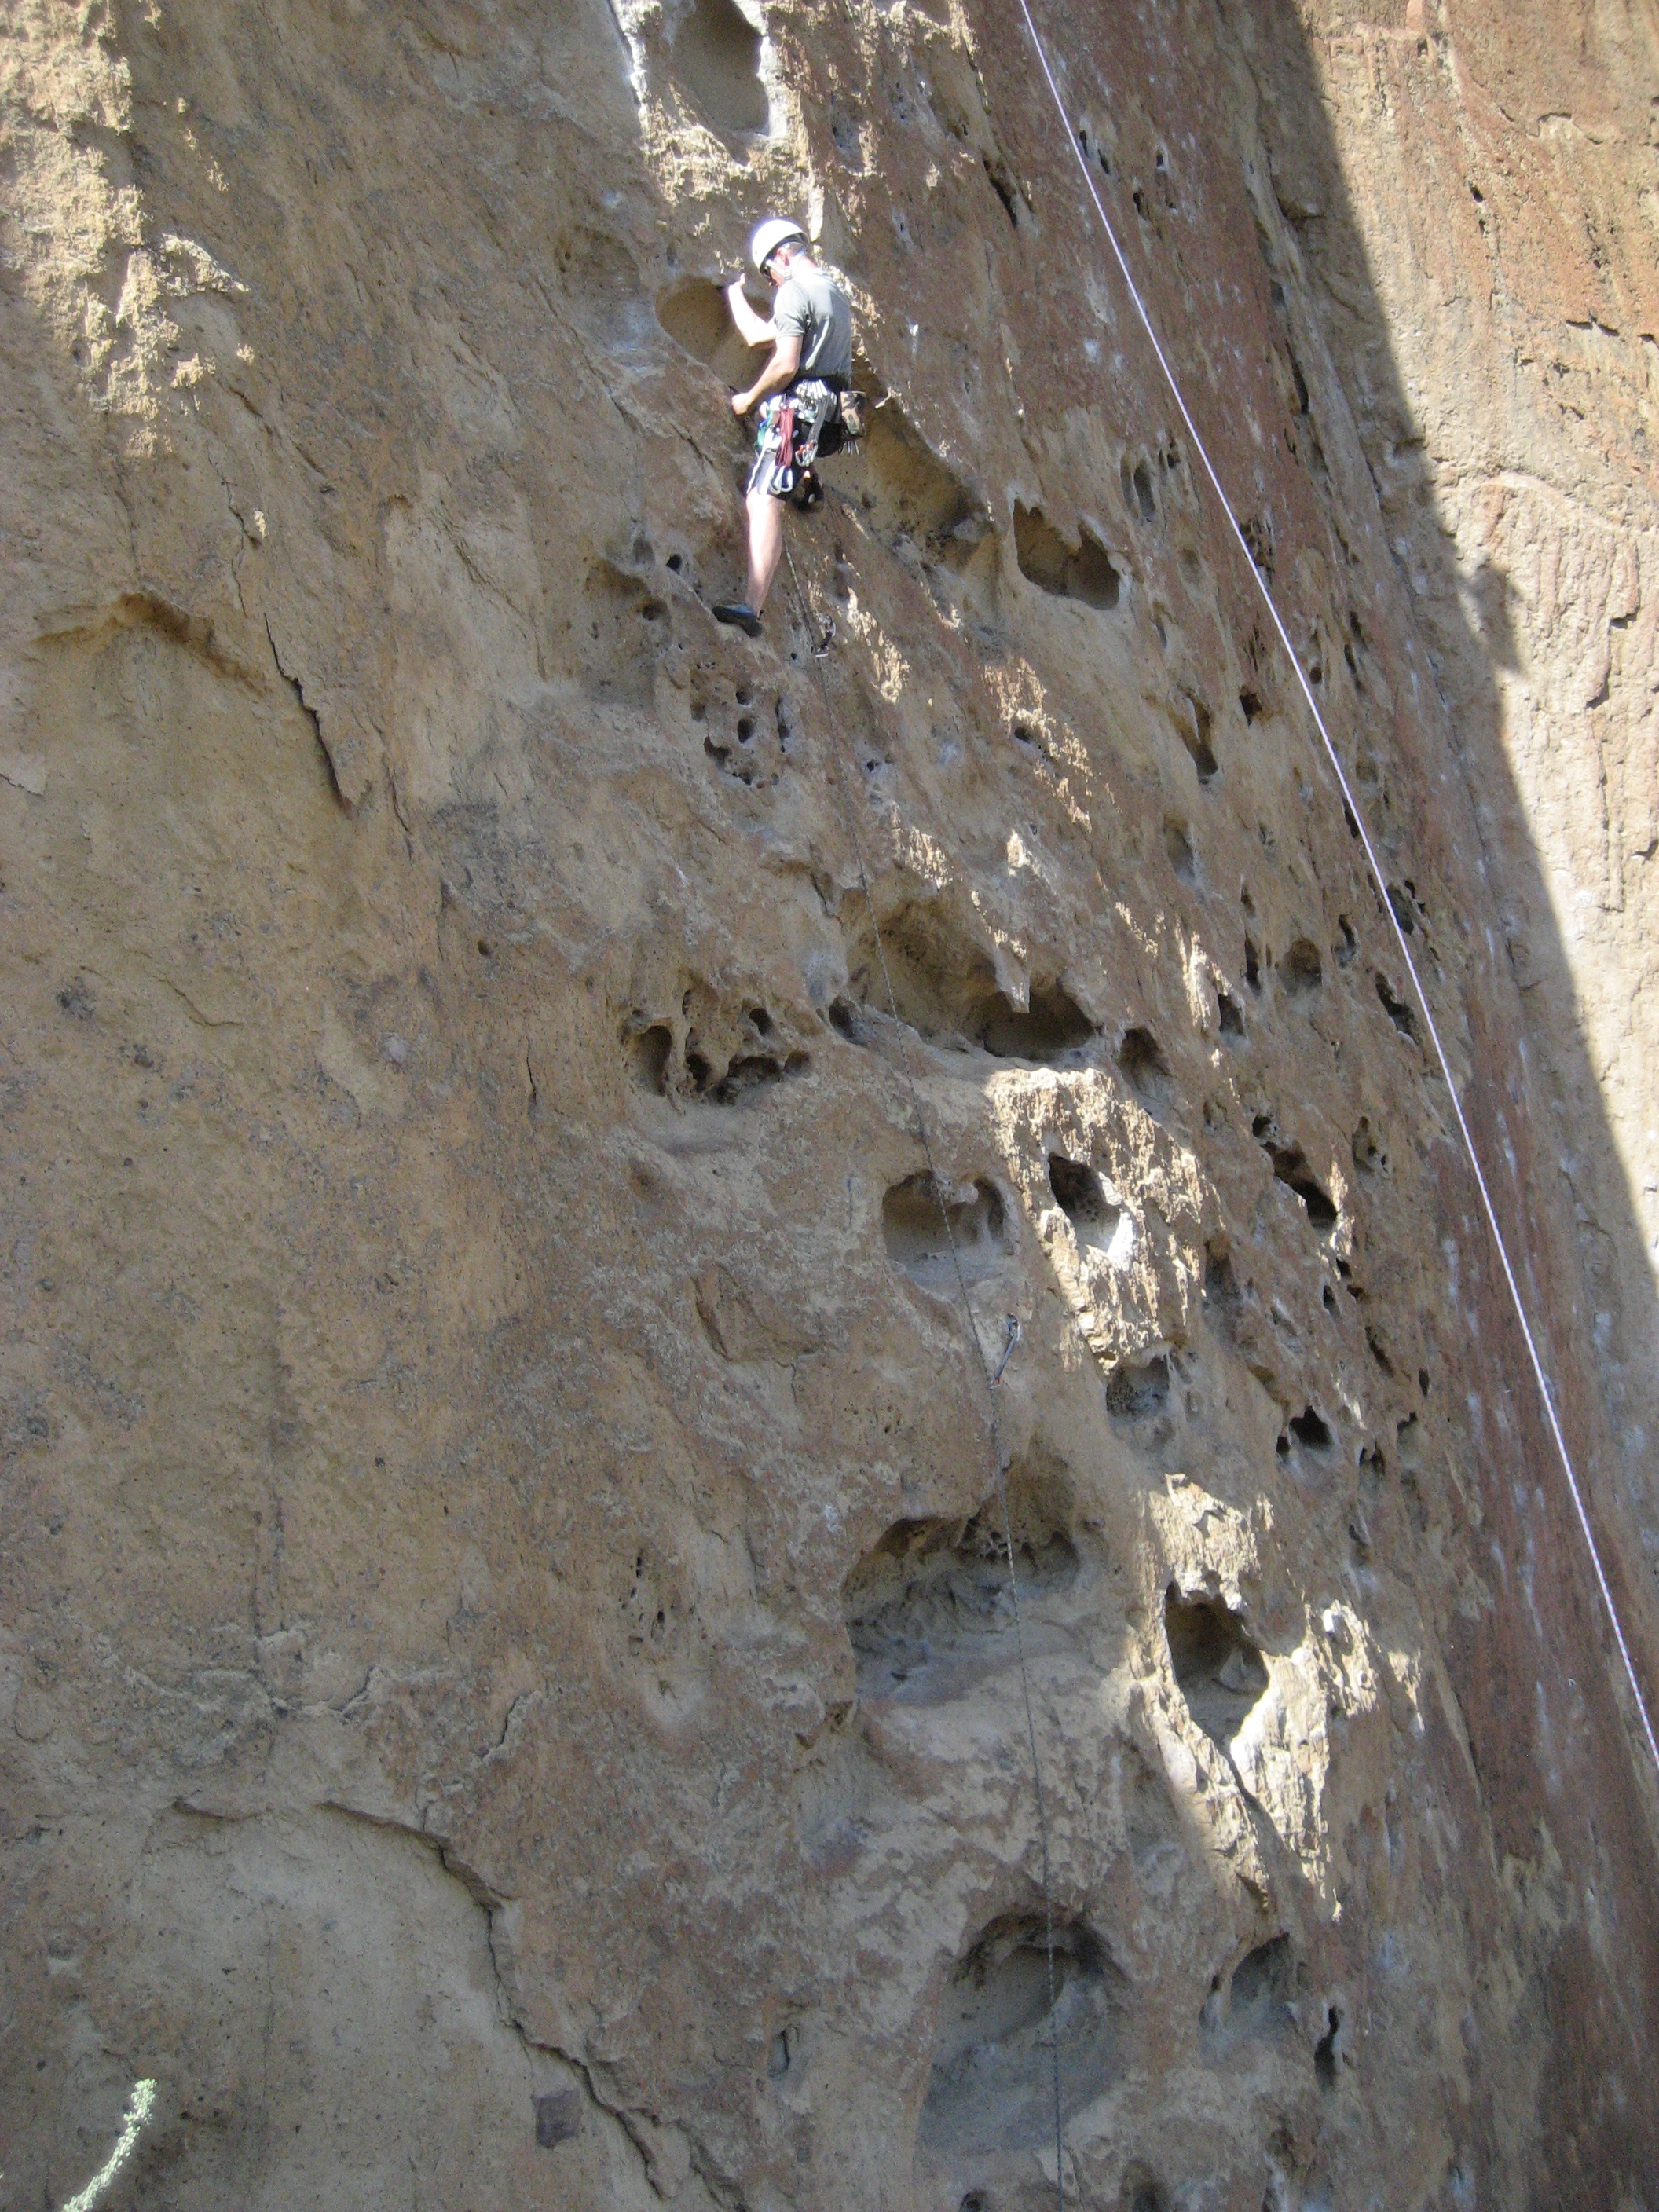
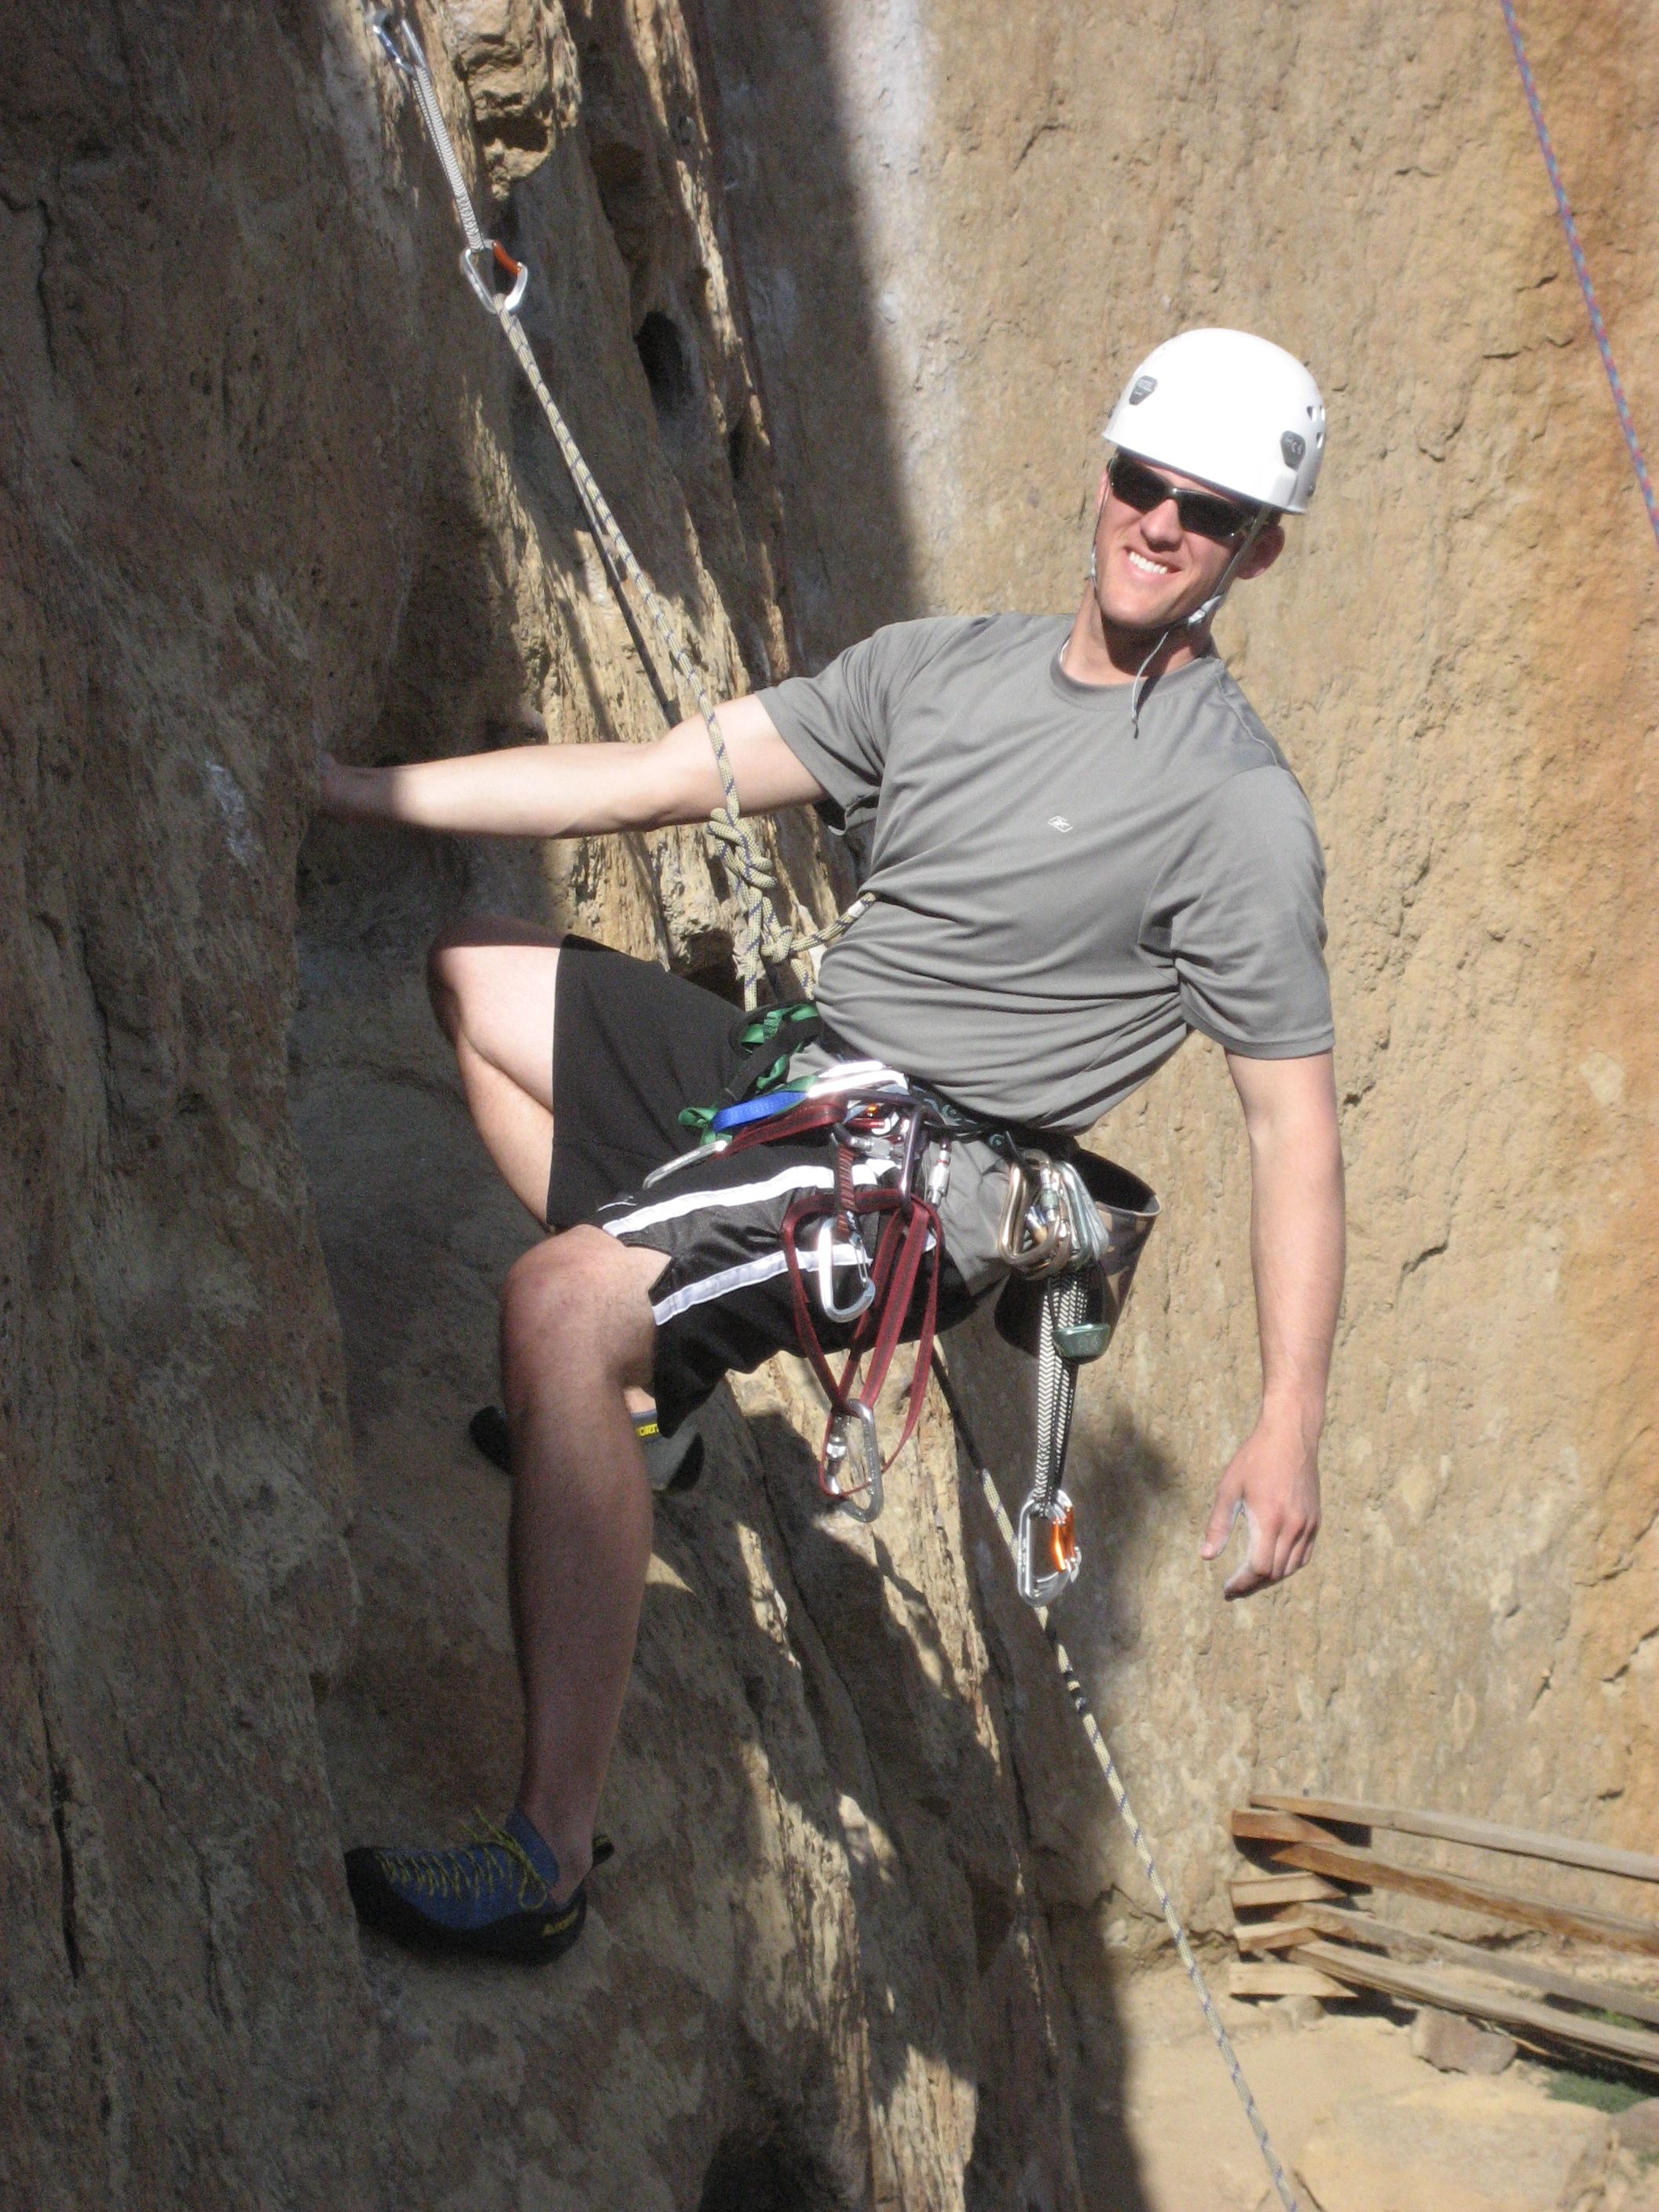
By the afternoon, we were getting a little tired of knobby face climbs on wickedly abrasive rock. We got some variety on the "5 Gallon Buckets" route, a ladder of pockets so big you could sit down inside most of them. Scott DV was anxious to lead this one and found the underclings in the pockets extremely gratifying. Just take at look at how confident he his flashing those pearly whites while on lead.
Here's a run down of the six routes we climbed. All three of us climbed each one of these with (almost) no falls at all.
Night Flight (5.5) Carl, Scott D., and Scott DV. each on lead in turn.
Easy Rider (5.6) Scott D. on lead.
Lichen It (5.8) Carl on lead.
Ginger Snap (5.8) Scott D. on lead.
Hop on Pop (5.8) Carl on lead.
5 gallon buckets (5.8) Scott DV. then Scott D. on lead.
Next time we go we'd like to lead some 5.9 routes, (and maybe bring a friend to put up some rope for us on some 5.10). One thing we didn't find was any terrain steep enough to make us comfortable to take any practice falls. I think Scott D. really missed that---sometimes I almost wonder if falling is his favorite part in this sport.
See the complete set of photos from this trip.
Posted Wed 22 Apr 2009 12:19:40 PM PDT